Tag Archives: Grub2

SlackEX (Slackware 15.0) live with LXQt 1.2 (latest), Refracta Snapshot and kernel 6.0.10-amd64-exton :: Build 221214

Slackware is the first widely-used Linux system, which is still developing. Slackware has existed since 1993. In comparison with for example Ubuntu and Linux Mint, many people believe that Slackware is “difficult”. Any novice can quickly learn to use Ubuntu they say. My remaster of Slackware Current (15.0), which I call SlackEX 15.0 Current 64 bit Linux Live DVD, is however just as easy to use as Ubuntu and/or Linux Mint. Some tend to complain that the Program Management in Slackware is awkward. That was perhaps earlier the case, but not anymore.

NEWS 221214 ABOUT SlackEX 15.0 with LXQt 1.2
Because I like Slackware so much I’ve made a new extra version of SlackEX 15.0. This time with LXQt 1.2 (latest version, released 221105) as Desktop environment. LXQt is a lightweight Qt desktop environment. It will not get in your way. It will not hang or slow down your system. It is focused on being a classic desktop with a modern look and feel. LXQt is not included in Slackware’s repositories. I’ve built the LXQt 1.2 packages following the instructions at Gitlab.com. I.e. I’ve used a script made by lancsuk. If you already have Slackware/SlackEX installed to hard drive you can do the same. (If you want LXQt). It’s very easy if you have KDE installed. Otherwise you’ll have to install some KDE/LXQt dependencies. Not that difficult though. So SlackEX Build 221214 is a live remaster of Slackware 15.0 stable. It was released 220203. You can install SlackEX to hard drive and also use Refracta Snapshot for creating your very own live installable Slackware 15.0 system. Kernel 6.0.10-amd64-exton-rt14 is used. You can (of course) install Slackware’s latest kernel 5.19 if you want. But to be able to create your own Slackware 15.0 system you will have to use (boot up with) kernel 6.0.10-amd64-exton-rt14. Study all pre-installed packages in Build 221214.
NOTE1: You’ll run SlackEX Build 221214 as root or as the ordinary user user. The password for root is root. The password for user is live.
NOTE2
: You can run SlackEX Build 221214 on UEFI and non-UEFI computers. You can also run SlackEX live super fast from RAM.
NOTE3: VirtualBox Guest Additions and are pre-installed, which means that you can run SlackEX in full screen in VirtualBox. Watch this screenshot…

SCREENSHOTS
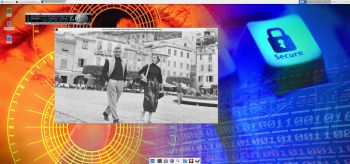
Screenshot 1 – root’s Desktop when Refracta Snapshot has started – LXQt
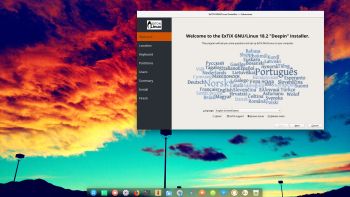
Screenshot 2 – user’s Desktop – LXQt
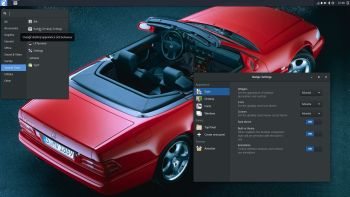
Screenshot 3 – SlackEX running in full screen in VirtualBox
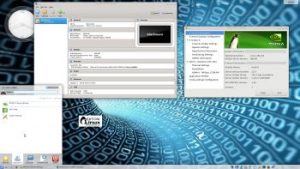
Screenshot 4 – Showing chroot/grub during a hard drive installation

READ MORE…

Read about my Android-x86 Systems – 11, 10, Pie, Oreo, Nougat, Marshmallow, Lollipop and KitKat at
andex.exton.net – latest is AndEX 11 (with GAPPS), AndEX 10 (with GAPPS) and AndEX Pie 9.0 (also with GAPPS)!
and
about my Android 12, 11, 10, Pie, Oreo, Nougat, Marshmallow and Lollipop versions for Raspberry Pi 4 and 3/2 at
raspex.exton.se
– latest is RaspAnd 12 (without GAPPS), RaspAnd 11 (with GAPPS) and RaspAnd Oreo 8.1 (also with GAPPS)!

SlackEX (Slackware) live with Enlightenment 0.24.2 (latest version), kernel 5.9.6-exton and Refracta Snapshot (create your own Slackware distro) :: Build 201112

Slackware is the first widely-used Linux system, which is still developing. Slackware has existed since 1993. In comparison with for example Ubuntu and Linux Mint, many people believe that Slackware is “difficult”. Any novice can quickly learn to use Ubuntu they say. My remaster of Slackware Current (14.2), which I call SlackEX 14.2/Current 64 bit Linux Live DVD, is however just as easy to use as Ubuntu and/or Linux Mint. Some tend to complain that the Program Management in Slackware is awkward. That was perhaps earlier the case, but not anymore. Now we have the Application Managers Slackpkg and GSlapt – a GTK version of slapt-get. They are a piece of cake to use! Users of Synaptic will feel at ease with GSlapt.

NEWS ABOUT SlackEX Build 201112 with the Enlightenment 0.24.2 Desktop
A new extra version of SlackEX is ready. In this version I’ve replaced Xfce4 with Enlightenment 0.24.2 – latest version. I’ve also replaced kernel 5.9.1-exton with kernel is 5.9.6-exton. This version of SlackEX is unique. You can’t find another Linux system with the latest Enlightenment version. When installing version 0.24.2 I followed the instructions here. The whole thing was very time consuming since a lot of dependencies had to be satisfied. All other packages from SlackEX Build 201105 remain. Most important Refracta Snapshot so you can build your own Slackware distro with Enlightenment 0.24.2. Study the full package LIST. Read about Enlightenment 0.24.2 features.

Screenshots
Screenshot 1 – Root’s Desktop – Enlightenment 0.24.2
Screenshot 2 – Live’s Desktop – Enlightenment 0.24.2
Screenshot 3 – Root’s Desktop when running in full screen in VMware Player – KDE (not pre-installed)

READ MORE…

Read about my Android-x86 Systems – 10, Pie, Oreo, Nougat, Marshmallow, Lollipop and KitKat at
andex.exton.net – latest is AndEX 10 (with GAPPS) and AndEX Pie 9.0 (also with GAPPS)!
and

about my Android 11, 10, Pie, Oreo, Nougat, Marshmallow and Lollipop versions for Raspberry Pi 3/2 at
raspex.exton.se
– latest is RaspAnd 11 (without GAPPS) and RaspAnd Oreo 8.1 (with GAPPS)!

ExTiX 18.2 with Deepin 15.5 Desktop, Refracta snapshot, Calamares 3.1.9 Installer and kernel 4.15.2-exton – Build 180210/180206

NEWS about ExTiX 18.2 Deepin 180210
I’ve released a new version of ExTIX 18.2 Deepin today with Calamares 3.1.9 installed from source and kernel 4.15.2-exton. Calamares is an installer framework. By design it is very customizable, in order to satisfy a wide variety of needs and use cases. All packages have been updated to the latest available version as of today. Study all installed packages in ExTiX Deepin Build 180210.  Please note that I’ve kept the first ExTiX 18.2 Deepin Build 180206 on the server. The kernel 4.15.1-x86_64-exton, used in Build 180206, is compiled in another way than kernel 4.15.2-exton used in Build 180210. In version 180206 of ExTiX 18.2 Deepin I “forgot” to install the kernel headers. That was the main reason for me to release a new version of ExTiX 18.2 Deepin again. The kernel headers are needed if you want to install certain extra packages in ExTiX, for example Nvidia’s proprietary graphics driver. You can download “my” kernel 4.15.2-exton if you want to use it in another Debian/Ubuntu system.

NEWS about ExTiX 18.2 Deepin 180206
I’ve released a new version of ExTIX 18.2 Deepin today with Calamares 3.1.9 installed from source and kernel 4.15.1-x86_64-exton. Calamares is an installer framework. By design it is very customizable, in order to satisfy a wide variety of needs and use cases. All packages have been updated to the latest available version as of today. Study all installed packages in ExTiX Deepin Build 180206.

About ExTiX 18.2 with the Deepin 15.5 Desktop
I’ve made a new extra version of ExTiX with Deepin 15.5 Desktop (made in China!). Deepin is devoted to providing a beautiful, easy to use, safe and reliable system for global users. Only a minimum of packages are installed in ExTiX Deepin. You can of course install all packages you want. Even while running ExTiX Deepin live. I.e. from a DVD or USB stick. Study all installed packages in ExTiX Deepin.

ABOUT ExTiX
All five ExTiX systems are based on Ubuntu and Debian.

The Ultimate Linux System
I’ve called my different versions of ExTiX The Ultimate Linux System for many years by now. As regards ExTiX 18.2 Deepin I feel it’s especially justified. Everything just works.

Used KERNEL
My special kernel 4.15.1-x86_64-exton corresponding Kernel.org’s latest kernel 4.15.1, released 180203.

What’s new in Linux kernel 4.15?

SCREENSHOTS
1. ExTiX Deepin 15.5 Desktop – running in VirtualBox
2. ExTiX Deepin running Refracta snapshot
3. ExTiX Deepin running in VirtualBox – changing Grub packages
4. Calamares 3.1.9 running in ExTiX 18.2
5. ExTiX Deepin running the Refracta Installer
6. ExTiX Deepin login screen (LightDM)
7. Showing many installed programs

READ MORE…


Read about my Android-x86 Systems – Oreo, Nougat, Marshmallow, Lollipop and KitKat at
andex.exton.net
– latest is AndEX Oreo 8.1!
and
about my Nougat, Marshmallow and Lollipop versions for Raspberry Pi 3/2 at
raspex.exton.se – latest is RaspAnd Nougat!

SlackEX Build 170831 (Slackware 14.2) live dvd with KDE 4.14.35, kernel 4.12.9-x86_64-exton, Google Chrome 60.0.3112 and VirtualBox 5.1.26

Slackware is the first widely-used Linux system, which is still developing. Slackware has existed since 1993. In comparison with for example Ubuntu and Linux Mint, many people believe that Slackware is “difficult”. Any novice can quickly learn to use Ubuntu they say. My remaster of Slackware Current (14.2), which I call SlackEX 14.2/Current 64 bit Linux Live DVD, is however just as easy to use as Ubuntu and/or Linux Mint. Some tend to complain that the Program Management in Slackware is awkward. That was perhaps earlier the case, but not anymore. Now we have the Application Managers Slackpkg and GSlapt – a GTK version of slapt-get. They are a piece of cake to use! Users of Synaptic will feel at ease with GSlapt.

New features in version 170831 of SlackEX
I have replaced kernel 4.10.2-x86_64-exton with kernel 4.12.9-x86_64-exton with support for “everything”. Most important is that I have changed repositories from Slackware 14.1 to Current. I.e. Slackware 14.2. KDE is upgraded to version 4.14.35 (latest KDE version). All other component software is also upgraded to the latest Slackware Current version by now. I may also mention in particular GParted 0.29.0, VirtualBox 5.1.26 (latest, not in Slackware’s repositories), Google Chrome 60.0.3112 (not in Slackware’s repositories – you can download my build at SourceForge.net), Gimp 2.8.10 (installed from source), GSlapt 0.5.4b, Slackpkg 2.82.1, Firefox 55.0.3, Thunderbird 52.3.0, Samba 4.6.7 and GCC 7.2.0. Furthermore I have installed Grub2, which can be used as boot loader (if you want) after a hard drive install. Study the full package LIST. Note: I have replaced Wicd with NetworkManager. It works better in SlackEX.

SCREENSHOTS
Screenshot 1 – KDE 4.14.35 Desktop with Netflix running
Screenshot 2 – KDE 4.14.35 Desktop with VirtualBox running
Screenshot 3 – Samba running
Screenshot 4 – Nvidia configuration
Screenshot 5 – Hard drive installation of SlackEX in VirtualBox

READ MORE….

How-to dual-boot, triple-boot or multi-boot Linux with Windows in a simple way and be happy

How-to dual-boot, triple-boot or multi-boot Linux with Windows in a simple way and be happy…

In this instruction I will show you how easy it is to have several Linux systems installed on one computer together with for example Windows 10. The configuration is so simple a ten year old child can do it.

BACKGROUND
Ubuntu and all Linux systems based on Ubuntu (such as Linux Mint) uses Grub2 as boot manager. Also Debian and most other Linux systems use Grub2. Grub2 works differently from the old Grub Legacy.

UEFI BIOS and non-UEFI BIOS
The Extensible Firmware Interface (EFI) or its version 2.x variant, Unified EFI (UEFI) is a firmware type that is widespread on recent computers, especially those more recent than 2010Ubuntu wiki.

Configuring Grub2 – Example for non-UEFI BIOS computers
One of my computers, an Acer Aspire 5750G from 2010, has a 750 GB hard drive and an external USB hard drive of 1000 GB. On that computer I have Windows 10 and twelve (12) different Linux systems installed. Of those twelve systems three are Android-x86 systems (AndEX Nougat and AndEX Marshmallow). Below I will describe step by step how I configured Grub2 in the easiest way possible.

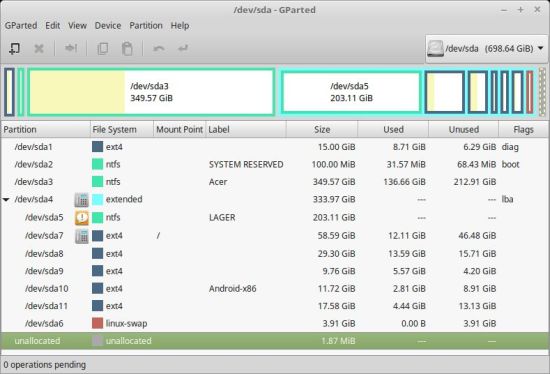
1. The computer was delivered with Windows 7 (now updated to Windows 10) preinstalled on /dev/sda2 and /dev/sda3. I immediately started up my computer from a Linux Mint Live DVD. Using GParted, I created seven new partitions on the internal hard drive and three on the external USB hard drive. After that I installed Mint on /dev/sda7 and Grub2 in MBR at the same time as the installer also suggested. Then I restarted my computer and checked that Mint (and Windows) could be started. Everything worked (as expected) fine. See the screenshots below showing how my partitioning looks like now.

The internal hard drive partitions
Note the 4 GB SWAP partition on /dev/sda6
The external USB drive partitions
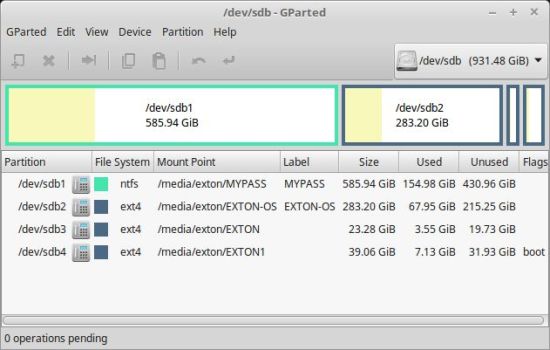
2. Then it was time to install Arch Linux on /dev/sda8. When the installation prompted installation of Grub2 during installation, I chose to install Grub2 on /dev/sda8. Such an installation of Grub2 does not affect the existing Grub2 installation in MBR. I did it just the same to find out “start data” for Arch Linux. I then read these start data from Mint in the /mnt/sda8/boot/grub/grub.cfg file.

3. After that I started Mint on /dev/sda7 again. Now it was time to get a real “multiboot computer” using Grub2. This is how I did it:
A) In /etc/grub.d I deleted all files except 00_header, 05_debian_theme, 06_mint_theme, 40_custom and README. Said folder then looked like this.
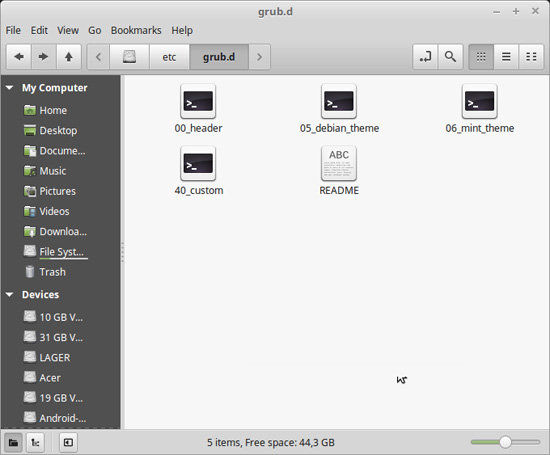


B)
I edited the /etc/grub.d/40_custom file to look like this. Note that this is how my 40_custom file looks like now when I have installed totally twelve Linux systems. The start data for Arch Linux (see above) was already fixed by looking at the /mnt/sda8/boot/grub/grub.cfg file. I could do it in a similar way when I installed the other eleven Linux systems.

Since this instruction is a bit old (from July 7, 2017) you can also have a look at the 40_custom file as it is today (211212) on one of my other computers – link.

C) Finally, I ran the update-grub command. Then the /boot/grub/grub.cfg file (which is the file Grub2 “takes into account” at boot) was created/changed. This file (grub.cfg) should never be edited manually. Instead, edit the file 40_custom, as I showed above. Always use Leafpad or Mousepad (or a similar simple editor) when editing 40_custom. Never LibreOffice Writer or Word or the like of them. Study my present grub.cfg file. When I now start up my Acer Aspire the boot screen look like this.
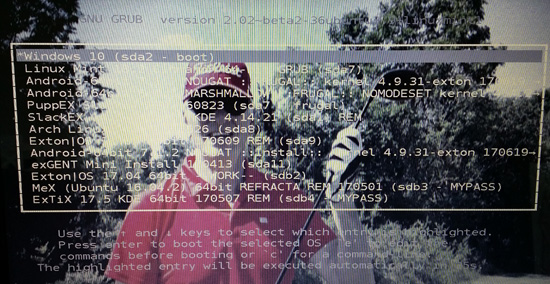
My BIOS settings on my Acer Aspire look like this.
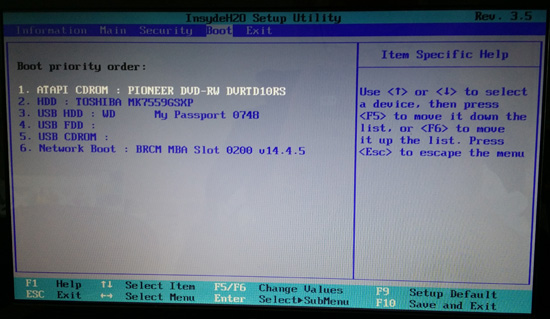
Configuring Grub2 – Example for UEFI BIOS computers
On another computer (laptop) Lenovo Z50 from 2015 I have Windows 10 installed together with three Linux systems. Ubuntu 17.04 and two Android-x86 systems. Since Windows 10 was installed in UEFI mode I also had to install Ubuntu 17.04 in UEFI mode to be able to configure Grub2 the way I describe above. I went into BIOS and changed the settings to look like this.
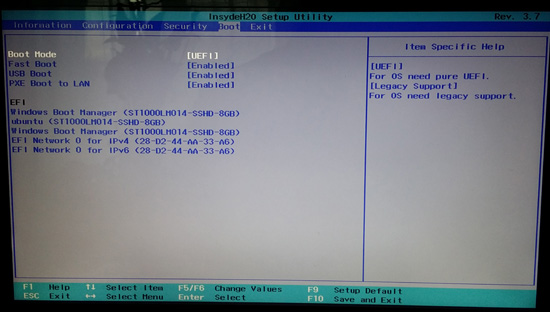
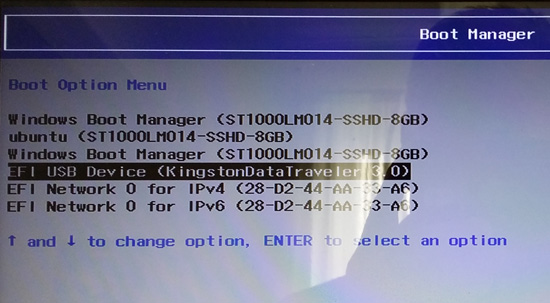
When I went into the boot menu in BIOS I could choose my USB stick. In this case Kingston DataTraveler – watch this screenshot.
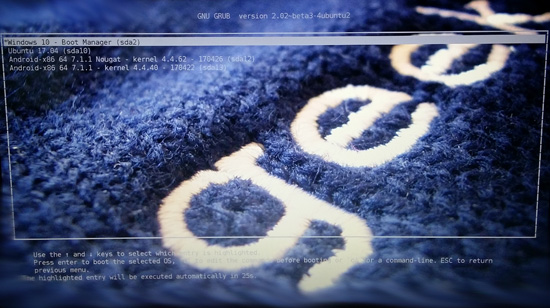
So I started up Ubuntu 17.04 from the USB stick and installed it on a partition I had created in advance using GParted. Since my Lenovo already had a ESP (EFI System Partition) I installed Grub2 onto that partition. When I now start up my Lenovo the boot screen looks like this. (You can of course install many more Linux systems if you like. Just edit /etc/grub.d/40_custom the way I describe above).
IMPORTANT: Identifying if the computer boots the Ubuntu DVD/USB stick in UEFI mode
If the BIOS is set up to boot the DVD/USB stick in UEFI mode, then you will see the screen below.

If the BIOS is NOT set up to boot the CD in UEFI mode, or if the disk is not 64-bit, then you will see the screen below.
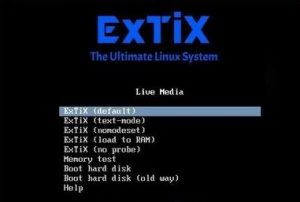

(ExTiX is based on Ubuntu)

Grub2 bootsplash
One of the benefits of Grub2 is that you can have a nice high resolution image as bootsplash/grub boot image. The image may have the same size as the resolution on your screen can handle, for example 1366×768. It is common with a regular image in jpg, png or tga format. Just place the image in /boot/grub and run the update-grub command. If you get the answer that the image is found in /boot/grub it will work. If not, try editing the /etc /default/grub file and add the line
GRUB_BACKGROUND = “/boot/grub/MyNicePicture.png”
Then run the update-grub command again (and restart the computer).

Have a look at my /etc/default/grub file.

Change the text – font and size – which Grub2 shows at boot

Run the following command:
grub-mkfont –output=/boot/grub/DejaVuSansMono.pf2 –size=24 /usr/share/fonts/truetype/ttf-dejavu/DejaVuSansMono.ttf
(Maybe you’ll need to run the command (apt-get install ttf-dejavu first). Then edit the /etc/default/grub file and add the following line.
GRUB_FONT=/boot/grub/DejaVuSansMono.pf2
Run the update-grub command again. After rebooting, the Grub2 boot menu will surely look better (depending on how your boot image looks like).

40_custom on my Lenovo Z50 computer as of today (211212) – see above
Since this instruction is a bit old (from July 7, 2017) you can also have a look at the 40_custom file as it is today (211212) on my Lenovo Z50 laptop – link.

############################################

Good luck!

/exton

Read about my Android-x86 Systems – 10, Pie, Oreo, Nougat, Marshmallow, Lollipop and KitKat at
andex.exton.net – latest is AndEX 10 (with GAPPS) and AndEX Pie 9.0 (also with GAPPS)!
and

about my Android 11, 10, Pie, Oreo, Nougat, Marshmallow and Lollipop versions for Raspberry Pi 4 and 3/2 at
raspex.exton.se
– latest is RaspAnd 11 (with GAPPS) and RaspAnd Oreo 8.1 (also with GAPPS)!
Yet another version of exGENT Live (Gentoo Linux) – now with Xfce 4.12.1 and LXQt 0.11.0 – Build 170407

NEWS 20170407 about exGENT
I’ve made yet a new version (20170407) of exGENT based on Gentoo Linux. It uses Xfce 4.12.1 and LXQt 0.11.0 Desktop environments and kernel 4.10.4. It is for the 64 bit architecture. I call it exGENT 2017 Xfce4/LXQt Live DVD. It replaces version 20170331. The ISO file is of 2620 MB due to the fact that this version has a lot of packages pre-installed. Despite this exGENT version 170407 runs surprisingly fast from DVD or USB. Even in VirtualBox and VMware. Faster than most other Linux live systems. All installed packages in exGENT have been updated to the latest available version by 170407.

What’s new in exGENT Build 170407?
The boot loader Grub Legacy has been replaced by Grub2. I started this build in the hope that I should be able to implement a new independent installer program called Calamares. I wasn’t able to do it now though. (Many dependencies to satisfy). My old installer script will have to do until I find a solution. Anyway, I think exGENT Build 170407 can be of interest because of the change to Grub2 and the fact that it has one of the newest kernels installed. MOST IMPORTANT: In versions before 170309 the file system wasn’t writable when running exGENT live (from DVD). Now you can emerge (install) new programs/packages even while running the system from a DVD or USB stick. If you do that and later decide to install exGENT to hard drive all your changes will follow! Furthermore you can install/transfer exGENT to a USB stick with the dd command in Linux or use Etcher and Rufus in Windows. Watch a screenshot when Etcher is running. Such installations were impossible before. Note: I have uninstalled Google Chrome. It’s not needed anymore, since Netflix runs very well in Firefox now. I’ve also added the LXQt Desktop environment. LXQt is a lightweight Qt desktop environment. It will not get in your way. It will not hang or slow down your system. It is focused on being a classic desktop with a modern look and feel. You can choose between Xfce4 and LXQt when logging in at Slim’s login screen. Just press F1.

Used KERNEL
My special kernel 4.10.4-aufs-gentoo-exton-big corresponding Kernel.org’s kernel 4.10.4.

Programs etc
The best thing with exGENT is the premier autodetection of hardware and the ability to easily install the system to hard drive during a live session. Installed programs: Among many others GParted, GNU Emacs, Firefox, Spotify, Thunderbird, Samba, Vlc, AbiWord, Nvidia Graphics driver 375.39 and NetworkManager. Furthermore compilation tools so that you can install programs from source the Gentoo way.

Who is exGENT/Gentoo for?
Experienced Linux users or those who really want to learn Linux. (Perhaps also for people who are bored with mainstream distributions like Ubuntu).

Screenshots

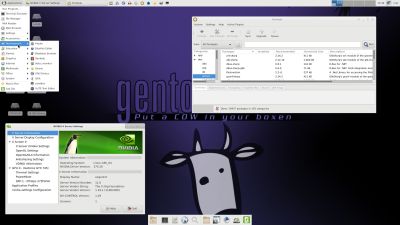
exGENT running Nvidia config
exGENT running Brasero
exGENT running Samba
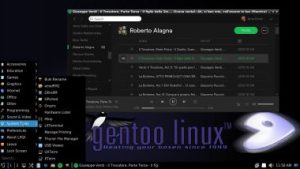
exGENT running Spotify – in Xfce4
exGENT running Spotify – in LXQt
exGENT running in VirtualBox
exGENT running in VMware (installation to virtual hard drive)
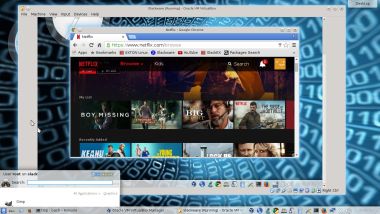
exGENT running Firefox and Netflix

READ MORE…

SlackEX (Slackware 14.2) Live DVD with KDE 4.14.27, Nvidia 375.39 and kernel 4.10.2-x86_64-exton – Build 170314

SlackEX is based on Slackware Current/14.2. Slackware is the first widely-used Linux system, which is still developing. Slackware has existed since 1993. The older the fiddle the sweeter the tune or as we say in Sweden: “Gammal är äldst”.

New features in version 170314 of SlackEX
I have replaced kernel 4.7.1-x86_64-exton with kernel 4.10.2-x86_64-exton with support for “everything”. Most important is that I have changed repositories from Slackware 14.1 to Current. I.e. Slackware 14.2. KDE is upgraded to version 4.14.27 (latest KDE version). All other component software is also upgraded to the latest Slackware Current version by now. I may also mention in particular GParted 0.27.0 (latest, not in Slackware’s repositories), VirtualBox 5.1.16 (latest, not in Slackware’s repositories), Google Chrome  (not in Slackware’s repositories), Nvidia’s proprietary Graphic driver 375.39 (latest driver), Gimp 2.8.10 (installed from source), GSlapt 0.5.4b, Slackpkg 2.82.1, Firefox 52.0, Thunderbird 45.2.8, Samba 4.5.5 and GCC 5.4.0. Furthermore I have installed Grub2, which can be used as boot loader (if you want) after a hard drive install. Study the full package LIST. Note: I have replaced Wicd with NetworkManager. It works better in SlackEX.

Install SlackEX to hard drive
Use this INSTRUCTION. You can (if you want) use Grub2 (new GRUB) as boot loader. (Slackware original still uses LILO). You can (of course) also run and install SlackEX in VirtualBox and VMware.

Install SlackEX to a USB stick
Please read my INSTALL INSTRUCTIONS. NOTE: All system changes are PERSISTENT.

Why Slackware?
Slackware is grossly underestimated (in my opinion). This article give you ten (10) reasons to choose Slackware.

SCREENSHOTS
Screenshot 1 – KDE 4.14.27 Desktop with Netflix running
Screenshot 2 – KDE 4.14.27 Desktop with VirtualBox running
Screenshot 3 – Samba running
Screenshot 4 – GSlapt running
Screenshot 5 – Nvidia configuration

READ MORE…

exGENT (Gentoo) 64 bit Linux Live DVD with Xfce4, Grub2 and kernel 4.10.1-gentoo-exton – Build 170303

NEWS 20170303 about exGENT
I’ve made yet a new version (20170303) of exGENT based on Gentoo Linux. Now with Xfce 4.12.1 and kernel 4.10.1. It is for the 64 bit architecture. I call it exGENT 2017 Xfce4 Live DVD. It replaces version 20170209. The ISO file is of 2760 MB due to the fact that this version has a lot of packages pre-installed. Despite this exGENT version 170303 runs surprisingly fast from DVD or USB. Even in VirtualBox and VMware. Faster than most other Linux live systems. All installed packages in exGENT have been updated to the latest available version by 170303.

What’s new in exGENT Build 170303?
The boot loader Grub Legacy has been replaced by Grub2. I started this build in the hope that I should be able to implement a new independent installer program called Calamares. I wasn’t able to do it now though. (Many dependencies to satisfy). My old installer script will have to do until I find a solution. Anyway, I think exGENT Build 170303 can be of interest because of the change to Grub2 and the fact that it has the newest kernel installed. 

Used KERNEL
My special kernel 4.10.1-gentoo-exton corresponding Kernel.org’s kernel 4.10.1. It’s the latest stable kernel as of now. (20170303).

What’s new in kernel 4.10?

Programs etc
The best thing with exGENT is the premier auto detection of hardware and the ability to easily install the system to hard drive during a live session. Installed programs: Among many others GParted, GNU Emacs, Firefox, Google Chrome, Vlc, Spotify, Thunderbird, Samba, AbiWord, 
Nvidia Graphics driver 378.09 and NetworkManager. Furthermore compilation tools so that you can install programs from source the Gentoo way. (After the installation to hard drive).

Quick install to Hard Drive
exGENT Linux can be installed to hard drive in 3 – 10 min. (Depending on computer type). This means that all of you who might hesitate to perform a normal Gentoo installation – which can take up to a couple of days – now have the chance to get this great Linux system (Gentoo) installed on your computers very easy.

SPOTIFY
You can easy and quick install Spotify in exGENT. Just run the command emerge spotify. The installation takes about 1 min.
NOTE: Spotify is pre-installed in Build 170303.

Google Chrome
To be able to run Netflix in exGENT you’ll need Google Chrome. Just install it with the command emerge –ask www-client/google-chrome
Screenshot 1
Screenshot 2
Screenshot 3 – Netflix is running
NOTE: Google Chrome is pre-installed in Build 170303.

Who is exGENT/Gentoo for?
Experienced Linux users or those who really want to learn Linux. (Perhaps also for people who are bored with mainstream distributions like Ubuntu).

Screenshots
exGENT running Nvidia config
exGENT running Brasero
exGENT running Samba
exGENT running Spotify
exGENT running in VirtualBox
exGENT running in VMware
exGENT running Google Chrome and Netflix

READ MORE about exGENT…