Tag Archives: 64 bit

Run latest Slackware 64 bit (15.0 STABLE) with Xfce4 live and create your own live installable Slackware 15.0 system with Refracta Snapshot!

About SlackEX 15.0 64 bit Build 230521 (Xfce4), Build 221210 (Enlightenment/Xfce4) and Build 221214 (LXQt)

Slackware is the first widely-used Linux system, which is still developing. Slackware has existed since 1993. In comparison with for example Ubuntu and Linux Mint, many people believe that Slackware is “difficult”. Any novice can quickly learn to use Ubuntu they say. My remaster of Slackware Current (15.0), which I call SlackEX 15.0 Current 64 bit Linux Live System, is however just as easy to use as Ubuntu and/or Linux Mint. Some tend to complain that the Program Management in Slackware is awkward. That was perhaps earlier the case, but not anymore.

NEWS ABOUT SlackEX BUILD 230521 with the Xfce4 DESKTOP ENVIRONMENT (DE)
A new version of SlackEX is ready. It is based on Slackware 15.0 STABLE released 220202 with Xfce4 as DE. The most important package installed is Refracta Snapshot. With that you can build your own Slackware 15.0 distribution. Xfce4 is one of Slackware’s official Desktop environments. The other one is KDE. Kernel 6.3.1-amd64-exton is used in this SlackEX Build. To be able to use Refracta Snapshot you’ll have to use said kernel. Otherwise you can (of course) replace “my” kernel with Slackware’s original kernel. Study the full package LIST.

Update/Upgrade the System
As regards my other two SlackEX Builds you can easily upgrade the systems to the present state of Slackware 15.0 stable. Just run the command sudo slackpkg update followed by sudo slackpkg upgrade-all.

SCREENSHOTS
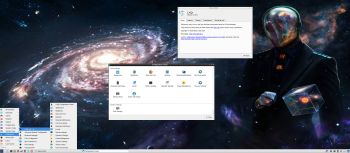
Screenshot 1root’s Desktop with Xfce4 as DE
Screenshot 2 – SlackEX running in VirtualBox in full screen when Guest additions have been installed
Screenshot 3showing a Samba connection
Screenshot 4Refracta Snapshot is running in VirtualBox

READ MORE…

Read about my Android-x86 Systems – 11, 10, Pie, Oreo, Nougat, Marshmallow, Lollipop and KitKat at
andex.exton.net – latest is AndEX 11 (with GAPPS), AndEX 10 (with GAPPS) and AndEX Pie 9.0 (also with GAPPS)!
and
about my Android 12, 11, 10, Pie, Oreo, Nougat, Marshmallow and Lollipop versions for Raspberry Pi 4 and 3/2 at
raspex.exton.se
– latest is RaspAnd 12 (without GAPPS), RaspAnd 11 (with GAPPS) and RaspAnd Oreo 8.1 (also with GAPPS)!

Yet another version of RaspEX Kodi 64-bit :: Now based on Debian 11 stable with the LXQt Desktop and Kodi 19.1 “Matrix” stable – Build 210904

NEWS 210904 about RaspEX Kodi 64-bit
I’ve made a new extra version of RaspEX Kodi 64-bit. This version is based on Raspbian (Raspberry Pi OS) and Debian Bullseye (Debian 11 stable). The LXDE Desktop is replaced with LXQt 0.16.0 which has a more “modern look” than LXDE. Historically, LXQt is the product of the merge between LXDE-Qt, an initial Qt flavour of LXDE, and Razor-qt, a project aiming to develop a Qt based desktop environment with similar objectives as the current LXQt. In RaspEX Kodi Build 210904 I’ve upgraded Kodi to version 19.1 Matrix since it has reached the “stable stage”. You can now much easier install extra repositories. Read about the best Kodi repos 2021.

NOTE: Build 210904 (64-bit) is missing the Netflix addon. Widevine CDM (which is necessary for Netflix to work) is not available natively on ARM64.

Boot problems as regards RaspEX Kodi Build 210904

If you can’t boot up the system after installing to the SD card using Rufus 3.15 in Windows it’s because the files /boot/cmdline.txt and /etc/fstab has the wrong content. I.e. the PARTUUID for the card is wrong. Then you’ll have to edit said files. Do it like this.
1. Start up a Linux system (Ubuntu or…).
2. Insert your SD card with RaspEX Kodi installed. It will be seen as /dev/sdb1 (boot partition) and /dev/sdb2 (root filesystem).
3. To find out the correct PARTUUID for /dev/sdb1 and /dev/sdb2 run the command blkid /dev/sdb1 respectively blkid /dev/sdb2
4. Now change to the correct PARTUUID in /boot/cmdline.txt and /etc/fstab on the SD card. Use Leafpad or Mousepad for that. Never LibreOffice writer!

The file cmdline.txt can look like this:
console=serial0,115200 console=tty1 root=PARTUUID=347a28ab-02 rootfstype=ext4 elevator=deadline fsck.repair=yes rootwait quiet splash plymouth.ignore-serial-consoles

The file fstab can look like this:
proc /proc proc defaults 0 0
PARTUUID=347a28ab-01 /boot vfat defaults 0 2
PARTUUID=347a28ab-02 / ext4 defaults,noatime 0 1
# a swapfile is not a swap partition, no line here
# use dphys-swapfile swap[on|off] for that

Study all installed packages in Build 210904…

Log in to LXQt or Kodi
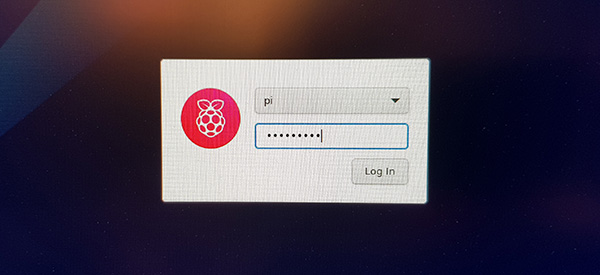
After the boot process is ready you will end up at LightDM‘s login screen. It will look like this – see below. Log in as pi with password raspberry or as root (“other”) with password root. You can log in to Kodi directly from LightDM if you want. While inside LXQt you can change to the Kodi Desktop environment. You can run Kodi on the LXQt Desktop like any other program or run it in full screen. Just change Kodi’s Settings from Windowed to Fullscreen. Watch this screenshot.
Expand the filesystem on the SD card
If you install many new big programs and/or download large files (for example videos) you may run out of space on the SD card. That is best fixed by running the following command: sudo raspi-config. Click on “Advanced Options” and choose A1 Expand Filesystem.
NOTE: That’s all you have to do. Just wait for the script to fix everything. If you use a SD card of 64 GB all the space on it will be used afterwards. Watch a screenshot when raspi-config is running.
1. Screenshot showing filesystem size before resizing
2. Screenshot showing filesystem size after resizing

API and Authentication keys
Google and Netflix make it more and more difficult to use the YouTube and Netflix addons in Kodi. They demand API and Authentication keys. As regards YouTube I’ve managed to solve the problem permanently. As regards Netflix you’ll have to create your Authentication key yourself. (Not as regards this version of RaspEX Kodi, since the Netflix addon can’t be used – see above).
Follow this instruction.
1. Read this INFO site. Then do this:
2. Download NFAuthenticationKey_Linux.zip
3. unzip NFAuthenticationKey_Linux.zip
4. cd NFAuthenticationKey_Linux
5. Run the script with the command python3 NFAuthenticationKey.pyscreenshot
6. Follow the instructions on the screen and save your Authentication key in /home/pi
7. Remember to take a note of the created four-digit PIN code
8. Open the Netflix addon in Kodi and choose to login with the the Authentication key you have created – screenshot
9. Find your Authentication key in /home/pi – screenshot
10. Give Netflix you password – done! – screenshot.

Your monitor/screen resolution
If you experience problems with the screen resolution you may have to make some changes in /boot/config.txt. The eight last lines in /boot/config.txt have the following content.
## exton
# Enable DRM VC4 V3D driver
# dtoverlay=vc4-fkms-v3d
dtoverlay=vc4-fkms-v3d,cma-344
max_framebuffers=2
arm_64bit=1
enable_uart=1
## exton end
My screen resolution is 3440×1440. If you have for example 1920×1080 you should change the line dtoverlay=vc4-fkms-v3d,cma-344 to dtoverlay=vc4-fkms-v3d,cma-192.

Used kernels

5.10.60-exton-v8l+ (for Rpi 4) and 5.10.60-v7+ (for Rpi 3 and 2).

Compatibility :: September 2021
Unfortunately not all systems made for Raspberry Pi 3 and 2 will run on the new Raspberry Pi 4 computer. They need to be upgraded with a new kernel. I therefore have to upgrade the systems I distribute. I.e. RaspEX, RaspEX with OpenCPN, exGENT, RaspEX BunsenLabs, RaspEX Kodi, RaspAnd Marshmallow, RaspAnd Nougat 7.1.2, RaspAnd Oreo 8.1, RaspAnd Pie, RaspAnd 10, RaspAnd 11 Build 210321, EXTON OpSuS Rpi, FedEX Rpi3 and RaspArch. I have until now (210321) only upgraded RaspAnd 11, RaspAnd 10, RaspEX, RaspEX Kodi, RaspArch, exGENT and RaspEX with OpenCPN. Read about the new Raspberry Pi 4.

SCREENSHOTS
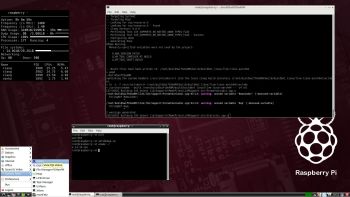
1. The LXQt Desktop running as user pi
2. The LXQt Desktop running as root

3. Kodi 19.1 system info
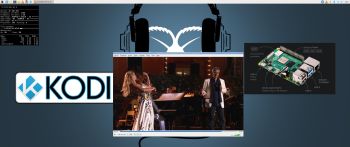
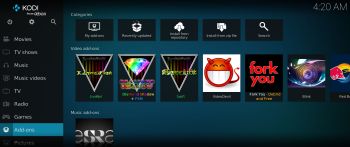
4. Kodi running showing some addons. (The Diamond Wizard repository is not included)

READ MORE…

Read about my Android-x86 Systems – 10, Pie, Oreo, Nougat, Marshmallow, Lollipop and KitKat at
andex.exton.net – latest is AndEX 10 (with GAPPS) and AndEX Pie 9.0 (also with GAPPS)!
and

about my Android 11, 10, Pie, Oreo, Nougat, Marshmallow and Lollipop versions for Raspberry Pi 4 and 3/2 at
raspex.exton.se
– latest is RaspAnd 11 (with GAPPS) and RaspAnd Oreo 8.1 (also with GAPPS)!
SlackEX Current (Slackware 15.0 BETA) 64 bit Live DVD with LXQt ::: Run latest Slackware 64 bit live and create your own live installable Slackware system with Refracta Snapshot ::: Build 210501

Slackware is the first widely-used Linux system, which is still developing. Slackware has existed since 1993. In comparison with for example Ubuntu and Linux Mint, many people believe that Slackware is “difficult”. Any novice can quickly learn to use Ubuntu they say. My remaster of Slackware Current (15.0/14.2), which I call SlackEX 15.0/14.2/Current 64 bit Linux Live DVD, is however just as easy to use as Ubuntu and/or Linux Mint. Some tend to complain that the Program Management in Slackware is awkward. That was perhaps earlier the case, but not anymore. Now we have the Application Managers Slackpkg and GSlapt – a GTK version of slapt-get. They are a piece of cake to use! Users of Synaptic will feel at ease with GSlapt. (Only in the Enlightenment version though).

NEWS ABOUT SlackEX 15.0 BETA with LXQt
Because I like Slackware so much I’ve made a new extra version of SlackEX 15.0 BETA. This time with LXQt as Desktop environment. LXQt is a lightweight Qt desktop environment. It will not get in your way. It will not hang or slow down your system. It is focused on being a classic desktop with a modern look and feel. LXQt is not included in Slackware’s repositories. I’ve built the LXQt packages following the instructions at Gitlab.com. If you already have Slackware/SlackEX installed to hard drive you can do the same. It’s very easy if you have KDE installed. Otherwise you’ll have to install some KDE/LXQt dependencies. Not that difficult though. So SlackEX Build 210501 is a live remaster of Slackware 15.0 BETA. You can install SlackEX to hard drive and also use Refracta Snapshot for creating your very own live installable Slackware 15.0 system. Two kernels are included in Build 210501. While running SlackEX live (from a DVD or USB stick) kernel 5.9.6-exton will be used. After a hard drive installation kernel 5.10.32-exton will be used. Kernel 5.10.32 is a long term release (LTS). To be able to create your own Slackware 15.0 system you will have to use (boot up with) kernel 5.9.6-exton.

NEW features in version 210501 of SlackEX
Kernel 5.9.6-exton is kept so that Refracta Snapshot can be used. Using Refracta Snapshot you can change everything and create your very own Slackware 15.0 system. Read more about Refracta at the INFO site. LXQt is used as Desktop environment. Furthermore I have installed Grub2, which can be used as boot loader (if you want) after a hard drive install using Refracta Installer. A lot of other Slackware packages are pre-installed. Study the full package LIST. Log in to LXQt as the ordinary user user with password live or as root with password root. While running SlackEX LXQt in VirtualBox you can do so in full screen since VirtualBox Guest Additions are pre-installed (as regards both kernels). Watch this screenshot.

Study all pre-installed packages in Build 210501…

SCREENSHOTS
Screenshot 1 – root’s Desktop when Refracta Snapshot has started
Screenshot 2 – user’s Desktop
Screenshot 3 – Showing a Samba connection

READ MORE…

Read about my Android-x86 Systems – 10, Pie, Oreo, Nougat, Marshmallow, Lollipop and KitKat at
andex.exton.net – latest is AndEX 10 (with GAPPS) and AndEX Pie 9.0 (also with GAPPS)!
and

about my Android 11, 10, Pie, Oreo, Nougat, Marshmallow and Lollipop versions for Raspberry Pi 4 and 3/2 at
raspex.exton.se
– latest is RaspAnd 11 (with GAPPS) and RaspAnd Oreo 8.1 (also with GAPPS)!

RaspEX Kodi 64-bit for Rpi4, Rpi3 and Rpi2 with the LXDE Desktop and Kodi 18.7 Media Center “Leia” based on upcoming Debian 11 “Bullseye” and Raspberry Pi OS (previously called Raspbian) – Build 200726

ABOUT RaspEX Kodi 64-bit
RaspEX Kodi Build 200713 (32-bit) and 200726 (64-bit) with LXDE/Kodi Desktops can be downloaded from SourceForge.net for free. The system is made especially for the new Raspberry Pi 4 (8GB, 4GB and 2GB). RaspEX Kodi is based on Debian 11 Bullseye respectively Debian 10 Buster, Raspberry Pi OS (previously called Raspbian) and Kodi Media Center. In RaspEX Kodi I’ve added the LXDE Desktop with many useful applications such as VLC Media Player and NetworkManager. Makes it easy to configure your wireless network. I’ve also upgraded Kodi to version 18.7 Leia, which makes it possible to include useful addons such as Netflix and Amazon Video. Which I’ve done in Build 200713. Study all included packages in RaspEX Kodi Build 200713 respectively Build 200726.

NOTE: Build 200726 (64-bit) is missing the Netflix and YouTube add-ons. You can (possibly) install them yourself. Without the YouTube add-on many other add-ons can’t run. Read about how to create and setup your YouTube API Key, ID and Secret for Kodi.

Passwords
pi/raspberry and root/root

Boot problems as regards RaspEX Kodi Build 200726

If you can’t boot up the system after installing to the SD card using Rufus 3.11 in Windows it’s because the files /boot/cmdline.txt and /etc/fstab has the wrong content. I.e. the PARTUUID for the card is wrong. Then you’ll have to edit said files. Do it like this.
1. Start up a Linux system (Ubuntu or…).
2. Insert your SD card with RaspEX Kodi installed. It will be seen as /dev/sdb1 (boot partition) and /dev/sdb2 (root filesystem).
3. To find out the correct PARTUUID for /dev/sdb1 and /dev/sdb2 run the command blkid /dev/sdb1 respectively blkid /dev/sdb2
4. Now change to the correct PARTUUID in /boot/cmdline.txt and /etc/fstab on the SD card. Use Leafpad or Mousepad for that. Never LibreOffice writer!

The file cmdline.txt can look like this:
console=serial0,115200 console=tty1 root=PARTUUID=347a28ab-02 rootfstype=ext4 elevator=deadline fsck.repair=yes rootwait quiet splash plymouth.ignore-serial-consoles

The file fstab can look like this:
proc /proc proc defaults 0 0
PARTUUID=347a28ab-01 /boot vfat defaults 0 2
PARTUUID=347a28ab-02 / ext4 defaults,noatime 0 1
# a swapfile is not a swap partition, no line here
# use dphys-swapfile swap[on|off] for that

Expand the filesystem on the SD card
If you install many new big programs and/or download large files (for example videos) you may run out of space on the SD card. That is best fixed by running the following command: sudo raspi-config. Click on “Advanced Options” and choose A1 Expand Filesystem.
NOTE: That’s all you have to do. Just wait for the script to fix everything. If you use a SD card of 32 GB all the space on it will be used afterwards. Watch a screenshot when raspi-config is running.

SCREENSHOTS
1. The LXDE Desktop logged in as the ordinary user pi in Build 200726
2. The LXDE Desktop logged in as root (super admin) in Build 200726
3. Kodi system info re. Build 200726
4. Error message when trying to run the YouTube add-on in Build 200726
5. Running Kodi in Build 200726

READ MORE or Download the new RaspEX Kodi 64-bit version right now…


Read about my Android-x86 Systems – 10, Pie, Oreo, Nougat, Marshmallow, Lollipop and KitKat at

andex.exton.net – latest is AndEX 10 (with GAPPS) and AndEX Pie 9.0 (also with GAPPS)!
and
about my Pie, Oreo, Nougat, Marshmallow and Lollipop versions for Raspberry Pi 3/2 at

raspex.exton.se – latest is RaspAnd Pie 9.0 (without GAPPS) and RaspAnd Oreo 8.1 (with GAPPS)!

PuppEX Bionic 64 bit, uefi, compatible with Ubuntu 18.04 :: Build 190331

NEWS 190331
Yesterday I released my first version of PuppEX Bionic64. After that I have discovered a way to install and run Spotify in PuppEX. So now you can run YouTube, Netflix and Spotify in the new PuppEX version of 190331. What more can one wish for?

ABOUT PuppEX Bionic Build 190331
My newest Puppy derivative is built from Puppy Linux 8.0 BionicPup 64 bit. I have added Google Chrome (for Netflix), PCManFM, LXTerminal and many development tools. I have also compiled a new kernel – 5.0.5-puppex. Kernel 5.0.5 is the latest stable kernel available from Kernel.org as of 190330. Furthermore I have installed Nvidia’s Proprietary Graphics driver 418.56. The Nvidia driver will be used if your computer/card is “good/modern” enough. If not automatically just open up a terminal and run the command nvidia-xconfig. Then restart X. Note: Firefox can’t be used in Puppy Linux. You won’t have sound.

PuppEX Bionic64 is compatible with Ubuntu 18.04, which means that Ubuntu packages for Ubuntu 18.04 can be installed and used in PuppEX. The PuppEX Bionic ISO is of 827 MB.

Performance
Puppy Bionic64 original is of only 354 MB. PuppEX Bionic64 is despite this still running as fast as the original, which means it runs very, very fast compared to most other Linux systems. (Puppy/PuppEX runs from RAM).

Study ALL installed packages in PuppEX Bionic64

SCREENSHOTS
PuppEX Bionic’s Desktop
Showing all main extra packages
Showing when Netflix is running
Showing a Wifi connection
Showing Nvidia settings
Spotify is running in PuppEX Build 190331

READ MORE…

RaspEX based on Ubuntu 18.10 with LXDE, kernel 4.14.76-v8+ (64 bit), Raspotify, RealVNC, PuTTy, Samba and Bluetooth – Build 181022

NEWS 181022
I’ve made an extra version of RaspEX LXDE. RaspEX Build 181022 uses a 64 bit kernel – 4.14.76-v8+. You can very easy switch back to the original 32 bit kernel (4.14.74-v7+) if you don’t find the 64 bit kernel useful. Since the Raspberry Pi 3 Model B and B+ only have 1GB RAM it’s perhaps useless to run a 64 bit kernel, but who knows…

View all installed packages in RaspEX – Build 181022

First things to do after installing RaspEX Build 181022
1. You won’t be automatically logged in to LXDE because the system is “full” (100 %). Log in to LXDE from Slim’s login page as root with password root.
2. Start up a terminal and run the command sh resize_rootfs.sh. Before that you can’t do anything because the system is full as this screenshot shows. After that all the space on the SD card will be used. Everything will be alright then.
3. Run the command dphys-swapfile setup
A SWAP file of 2 GB will be created. Then run the command dphys-swapfile swapon. Very useful if you want to run many programs at the same time.

When you have done step 1 – 3 you can use RaspEX Build 181022 in the same way as Build 181015. If you (for some reason) don’t like the 64 bit kernel (4.14.76-v8+) you can very easy change back to the original 32 bit kernel. Just edit /boot/config.txt to look like this (in relevant parts) and reboot your Raspberry Pi.

#####################################################
### 64 bit exton 181022
#device_tree=dtbs/4.14.76-v8+/broadcom/bcm2710-rpi-3-b-plus.dtb
#overlay_prefix=dtbs/4.14.76-v8+/overlays/
#kernel=kernel8.img
### end exton

### 32 bit exton 181022
kernel=kernel7.img
# end exton
#####################################################

Another good thing is that Ubuntu 18.10 now has been released in a stable version. All packages in RaspEX Build 181022 are (of course) in latest version as of 181022.

READ MORE…

Run your Ubuntu/Debian 64 bit system with the latest kernel – 4.18.3!

linuxI have compiled yet another Ubuntu/Debian kernel for 64 bit systems. This time kernel 4.18.3-exton, equivalent to Kernel.org’s latest kernel 4.18.3 released yesterday (180818).

What’s new in Linux kernel 4.18?

Install kernel 4.18.3-exton in Ubuntu/Debian based distributions
My self-compiled Ubuntu kernels can be used in all types of modern Ubuntu systems, including Mint. They can even be used in Debian Stretch (Debian 9) and Debian Buster (upcoming Debian 10). If you want to use my kernel 4.18.3-exton for 64 bit systems, you can DOWNLOAD it from here.

Installation instructions
Open the zip-file with WinZip, WinRAR or 7-Zip. Or run this command: unzip ubuntu-kernel-64bit-4.18.3-exton.zip. Go into the folder ubuntu-kernel-64bit-4.18.3-exton and run this command:
sudo dpkg -i *.deb

Then: Run command sudo update-grub (if you use Grub2).

Nvidia
It is possible to install Nvidia’s proprietary drivers if you use “my” kernel 4.18.3-exton. Could be useful if you like to play games. The Nvidia drivers in for example Ubuntu’s repositories – “Current” etc. – can’t be used. It is supposed to be “impossible” to install Nvidia’s latest drivers when running kernel 4.18 without “patches” etc. On the other hand it’s a fact that kernel 4.18 has better support for the open-source Nvidia driver Nouveau than any other older kernel.

A small clarification
“My” kernel 4.18.3-exton is compiled (almost) the same way as all official Ubuntu kernels. That is, The Ubuntu Way. If not, the kernel would not function in a Ubuntu/Debian system.

Good luck!


Read about my Android-x86 Systems – Oreo, Nougat, Marshmallow, Lollipop and KitKat at

andex.exton.net – latest is AndEX Oreo 8.1!

and

about my Oreo, Nougat, Marshmallow and Lollipop versions for Raspberry Pi 3/2 at
raspex.exton.se – latest is RaspAnd Oreo 8.1!


Run your Slackware installation with the latest kernel – 4.13-rc2!

SlackwareNEWS 170725
Kernel 4.13-rc2-x86_64-exton is my newest Slackware kernel. Kernel 4.13-rc2 was released by Kernel.org on July 23, 2017.

I have compiled a very useful (as I think) 64 bit kernel for Slackware Current (14.2) and/or all Slackware derivatives. For example Slax, Zenwalk and SlackEX. The kernel is compiled exactly in the same way as Slackware’s latest kernel huge. “My” kernel 4.13-rc2-x86_64-exton has even more support for new hardware, etc. Kernel 4.13-rc2 is the latest kernel available from Kernel.org. Released 20170723.

What’s new in kernel 4.13?

If you want to install my kernel in your Slackware 64 bit system, do this:

1. Download linux-kernel-4.13-rc2-x86_64-exton.txzmd5sum
2. Install it with the command installpkg linux-kernel-4.13-rc2-x86_64-exton.txz
(The kernel is packed just like Slackware’s original kernels so that everything ends up in the right place)
4. If necessary, change your Grub Legacy/Grub2 configuration
5. If you have an Nvidia graphics card in your computer, you may need to look over your files in /etc/modprobe.d before restarting the computer. That is remove the “blacklisting” of Nouveau’s kernel module in the appropriate files blacklist.conf and nvidia-installer-disable-nouveau.conf. With “my” kernel functions the Nouveau “free” driver works just fine.

NOTE: When you run the command installpkg linux-kernel-4.13-rc2-x86_64-exton.txz vmlinuz will be “created” in /boot. If you have /boot/vmlinuz already that file will be overwritten. In case you want to switch back to your old kernel you should make a backup of /boot/vmlinuz before you run the just mentioned command.

Restart your computer and enjoy!

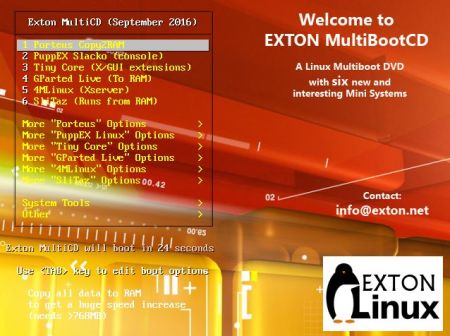
EXTON MultiBootCD | version 160928 with six new mini Linux OS

exton-multibootcd-boot-smallLatest News about EXTON Linux MultiBootCD 6-OS
28.9.2016

A new version of EXTON Linux MultibootCD 6-OS is ready. Changes: New (latest) versions of Porteus, GParted, Puppy Linux (PuppEX Slack64), 4MLinux, SliTaz and Tiny Core. Note about VirtualBox: All systems but Porteus can run in VirtualBox. Why Porteus won’t run I don’t know.

What’s the point of running EXTON Linux MultiBootCD 6-OS?
Anyone who is slightly interested in Linux and want to see how far the development of the most famous mini Linux systems have reached should try it. Easy then to test the current systems on the CD (DVD) live to find out which one suits you (and your computer) best.

Screenshots – see below…


Porteus
Porteus
PuppEX
PuppEX
Tiny Core
Tiny Core
GParted
GParted Live
4MLinux4MLinux SliTaz
SliTaz

READ MORE…

AndEX Marshmallow 6.0.1 – 64bit – with GAPPS and kernel-4.4.20-exton-android-x86_64 – Build 160922

andex-marshmallow-64bit-screenshot-desktop-smallNEWS 160922 – AndEX 64bit – Marshmallow 6.0.1 with kernel 4.4.20-exton-android-x86_64 and GAPPS
My build of Android-x86_64 Marshmallow 6.0.1 has GAPPS pre-installed. I.e. Google Play Services, Google Play Store, Gmail and more apps. Other pre-installed apps are for example Aptoide App Manager and Clash of Clans. The ISO is called android_x86_64-marshmallow-6.0.1-gapps-736mb-160922.iso. AndEX Marshmallow 64bit Build 160922 is totally error-free (as far as I know). Everything just works! About Google Play Services – read below and see this slideshow.

About
My compiled Android-x86_64 system (Marshmallow 6.0.1) can run live (from CD) or be installed on almost all laptops (and some Desktop computers). For example Acer (Aspire), HP, Samsung, Dell, Toshiba, Lenovo, Thinkpad, Fujitsu, Panasonic and Asus laptops. The Android system is distributed in the form of an ISO file as the rest of my Linux distributions. I.e. you must (as usual) burn the ISO file to a DVD if you want to run the system live on your computer or install it to hard drive. Read about how to burn ISO files. Or skip that. Just use ImgBurn. Nothing can go wrong.

More about AndEX Marshmallow 64 bit
Marshmallow 6.0.1 is the second latest version of the Android mobile operating system developed by Google. I call my remaster of it AndEX Marshmallow 64bit Live DVD. It uses “my” special kernel 4.4.20-exton-android-x86_64 with some extra features. I.e. extra drivers. My Android-x86 KitKat 4.4.4 build from 2016-02-14 will also cost you 9 $. I has one advantage over the Nougat, Marshmallow and Lollipop AndEX versions: The system can be used also on older laptops. Read more about the KitKat 4.4.4 version 160214 or DOWNLOAD it instantly.

Google Play Services
When you start up AndEX Marshmallow Build 160922 for the first time you will get an error message saying that “Google Play Services has stopped”. (As in my previous builds of AndEX). This is easily fixed by going to Settings – Apps – Google Play Services. Give Google Play Services ALL permissions. After  that you won’t see any more error messages.

Installing new apps in AndEX Marshmallow 64 bit
Use Google Play Store or Aptoide App Manager, which are pre-installed. Just make your choices! See screenshots when I’m installing Spotify, Google Chrome and YouTube while running AndEX Marshmallow Build 160922 from hard drive.

REPLACEMENT
Version 160922 (64 bit) replaces version 160220 of AndEX Marshmallow (32 bit).

Screenshots
AndEX Marshmallow’s Desktop with some extra apps
AndEX Marshmallow running the famous game Clash of Clans (pre-installed)
AndEX Marshmallow running Spotify

READ MORE….