Category Archives: Uncategorized

About NixOS – How to multiboot the system together with several other Linux systems and Windows :: 200507

What is NixOS?
NixOS is a Linux distribution with a unique approach to package and configuration management. Built on top of the Nix package manager, it is completely declarative, makes upgrading systems reliable, and has many other advantages.

I think NixOS is a very interesting and useful Linux system, but a bit difficult to handle, since it doesn’t work like any other Linux system. I.e. the installation to hard drive is very special, the file system is different and NixOS uses special commands, which you can’t use in any other Linux system. However, if you follow my instruction below you can install NixOS without messing up your current Grub boot configuration and finally enjoy NixOS running from hard drive.

INSTRUCTION
1. Download NixOS and install the ISO to a USB stick using Rufus 3.10 in Windows. Start up your computer from the USB stick
2. Install NixOS by following the NixOS Installation Manual
3. Add the lines below to /etc/nixos/configuration.nix and be sure not to install Grub during the NixOS installation. Open configuration.nix with Nano.

boot.loader = {

grub.enable = true;
grub.version = 2;
grub.device = “nodev”;
};

4. Reboot and start up the Linux system (for example Ubuntu) where you have Grub installed. Add the lines below to /boot/grub.cfg or
/etc/grub.d/40_custom

menuentry ‘NixOS’ {
boot.loader.grub.device = “nodev”;
set root='(hd0,X)’
configfile ‘/boot/grub/grub.cfg’;
}

NOTE1: You shall of course replace “X” with the correct number for your install partition. For example (hd0,6)

5. If something goes wrong you can always chroot (change root) into your NixOS partition. Do it like this.
A) Start up your computer from the NixOS DVD or USB stick and run the command mount /dev/disk/by-label/nixos /mnt
B) Then run the command nixos-enter
C) You can also do a manual chroot from any Linux system – watch this screenshot
D) Now you can install any extra (or missed) packages. Example: nix-env -i wireless-tools
NOTE2: When installing packages in chroot you may get an error message saying that the “Operation is not permitted”.
That can be fixed by adding the line nix.readOnlyStore = false to the end of /etc/nixos/configuration.nix.
NOTE3:  While in chroot you may not get a Internet connection. That is fixed by editing /etc/resolv.conf. Add the line nameserver 8. 8.8.8. Open resolv.conf with the command nano /etc/resolv.conf.

Difficulties with NetworkManager
If you can’t get a Internet connection through WiFi when you have started NixOS from hard drive you should start up your computer from the DVD/USB stick again and chroot as described above.

A) Then install NetworkManager and NM-applet with the command: nix-env -i network-manager network-manager-applet

B) Edit /etc/nixos/configuration.nix like this – see below. (Open the file with Nano).

networking.wireless.enable = false;
## Only one daemon, wireless or networkmanager, could be ## enabled at the same time.
networking.networkmanager.enable = true;

C) Rebuild NixOS with the command:
nixos-rebuild switch –upgrade –show-trace

D) Reboot and start NetworkManager service daemon with the command: systemctl restart networkmanager
NOTE: The last command may not be necessary. If you see the NM-applet to the right in the panel just click on it and connect.

About multiboot with Grub
On the computer where I now have NixOS installed I also have nine (9) other Linux systems and Windows 10 installed. Study my Grub configuration (/boot/grub/grub.cfg). You may also find my instruction How To dual boot, triple boot or multi boot Linux with Windows in a simple way and be happy interesting.

Screenshots from my NixOS installation
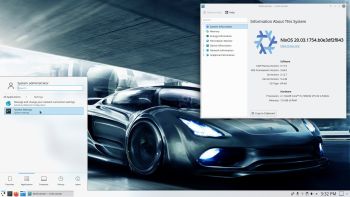
1. The Desktop when running as root

2. The Desktop when running as an ordinary user
3. Spotify is running (install Spotify with the command: nix-env -i spotify)

Good luck!  /exton

Read about my Android-x86 Systems – 10, Pie, Oreo, Nougat, Marshmallow, Lollipop and KitKat at

andex.exton.net – latest is AndEX 10 (with GAPPS) and AndEX Pie 9.0 (also with GAPPS)!
and
about my Pie, Oreo, Nougat, Marshmallow and Lollipop versions for Raspberry Pi 3/2 at
raspex.exton.se – latest is RaspAnd Pie 9.0 (without GAPPS) and RaspAnd Oreo 8.1 (with GAPPS)!

SlackEX (Slackware 14.2) Live DVD with KDE 4.14.27, Nvidia 375.39 and kernel 4.10.2-x86_64-exton – Build 170314

SlackEX is based on Slackware Current/14.2. Slackware is the first widely-used Linux system, which is still developing. Slackware has existed since 1993. The older the fiddle the sweeter the tune or as we say in Sweden: “Gammal är äldst”.

New features in version 170314 of SlackEX
I have replaced kernel 4.7.1-x86_64-exton with kernel 4.10.2-x86_64-exton with support for “everything”. Most important is that I have changed repositories from Slackware 14.1 to Current. I.e. Slackware 14.2. KDE is upgraded to version 4.14.27 (latest KDE version). All other component software is also upgraded to the latest Slackware Current version by now. I may also mention in particular GParted 0.27.0 (latest, not in Slackware’s repositories), VirtualBox 5.1.16 (latest, not in Slackware’s repositories), Google Chrome  (not in Slackware’s repositories), Nvidia’s proprietary Graphic driver 375.39 (latest driver), Gimp 2.8.10 (installed from source), GSlapt 0.5.4b, Slackpkg 2.82.1, Firefox 52.0, Thunderbird 45.2.8, Samba 4.5.5 and GCC 5.4.0. Furthermore I have installed Grub2, which can be used as boot loader (if you want) after a hard drive install. Study the full package LIST. Note: I have replaced Wicd with NetworkManager. It works better in SlackEX.

Install SlackEX to hard drive
Use this INSTRUCTION. You can (if you want) use Grub2 (new GRUB) as boot loader. (Slackware original still uses LILO). You can (of course) also run and install SlackEX in VirtualBox and VMware.

Install SlackEX to a USB stick
Please read my INSTALL INSTRUCTIONS. NOTE: All system changes are PERSISTENT.

Why Slackware?
Slackware is grossly underestimated (in my opinion). This article give you ten (10) reasons to choose Slackware.

SCREENSHOTS
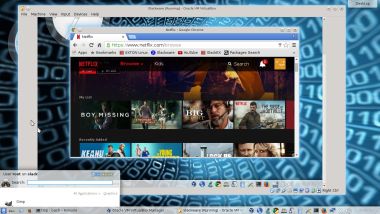
Screenshot 1 – KDE 4.14.27 Desktop with Netflix running
Screenshot 2 – KDE 4.14.27 Desktop with VirtualBox running
Screenshot 3 – Samba running
Screenshot 4 – GSlapt running
Screenshot 5 – Nvidia configuration

READ MORE…

Android-x86 KitKat 4.4.4 Build 9 with GAPPS, kernel 4.4.0-exton-android-x86, Bluetooth (working!) and Mesa 10.5.9

android-x86-desktop-160214-smallAndroid-x86 KitKat 4.4.4 Exton build 160214, version 9, is a ready!
I’ve added Mesa (3D Graphics Library) 10.5.9 for better Graphic performance. The system can run live (from CD or a USB stick) on almost all laptops (and some Desktop computers). For example Acer (Aspire), HP, Samsung, Dell, Toshiba, Lenovo, Thinkpad, Fujitsu, Panasonic and Ausus laptops. I can also mention that I could run this version without problems on a HP Pavilion 500 Desktop Computer. The Android system is distributed in the form of an ISO file as the rest of my Linux distributions. I.e. you must (as usual) burn the ISO file to a CD if you want to run the system live on your computer or install it to hard drive. Read about how to burn ISO files. Or skip that. Just use ImgBurn. Nothing can go wrong. You can easily install the system to your hard drive and install new apps. You can also install new apps while running the system live. Google Play Store  and Aptoide App Manager are pre-installed so you can just make your choices…

Used kernel
4.4.0-exton-android-x86. The original Android-x86 KitKat version uses kernel 4.0.9.

Replacement
This version (version 9) replaces all my previous (8) Android-x86 4.4.4 KitKat builds. In version 9 (as in version 8) I’ve added GAPPS. I.e. Google Play Services, Google Play Store, Maps, YouTube and more apps. Everything just works.

Updates

If you install Andriod-x86 to your hard drive or to a USB stick with persistence installed apps will be automatically updated/upgraded via Google Play Store. The system will check for updates all the time or after a reboot. It works in the same way as on your Android phone.

ATI Radeon compatibility
I can mention that this KitKat Build 9 works on my old Acer Aspire 5102WLMi AMD with ATI Radeon Xpress 1100. Many 3D games run just fine.

What’s the point?

Well, if you like your Android phone and all the apps you have installed on it I’m sure you will also like to run apps from your laptop. Bigger screen and better sound etc. Read my article About how useful an Android-x86 system can be for the average computer user.

Need to upgrade?
Well, if you have installed any of my previous KitKat versions with GAPPS to your hard drive and the system is working alright you don’t “have to” upgrade. That’s because (as I say above) all included GAPPS will be upgraded automatically (just like your Android phone). Otherwise you can contact me so I can send you the new download link. Then please show your previous receipt.

Screenshots
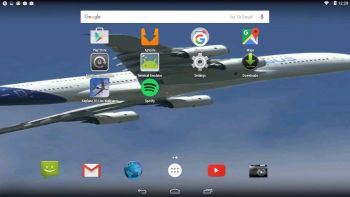
The Airplane 3D Live Desktop pic 1
Showing all installed apps pic 2
Enable Bluetooth in Settings pic 3
Scanning for Bluetooth devices with Bluetooth File Transfer pic 4

READ MORE…

Exton|OS 64 bit with Mate and kernel 3.19.0-14-exton :: build 150428

NEWS ABOUT Exton|OS build 150428
A new and much better version of Exton|OS is ready. I have replaced kernel 3.19.0-5-exton with kernel 3.19.0-14-exton. With kernel 3.19.0 there is no real need to use Nvidia proprietary graphic drivers since this kernel has better support for the open-source Nvidia driver Nouveau than any other older kernel. The Mate Desktop is upgraded to version 1.8.1. I have also replaced Ubuntu’s installation program Ubiquity with Exton|OS Installer, which is a clone of Debian Live Installer. The installation to hard drive is now so simple that a 10 year old child can do it. Watch a SLIDESHOW of the hard drive installation process.

MORE ABOUT VERSION 150428
Exton|OS
build 150428 is based on Ubuntu 15.04 64 bit (released April 23, 2015) and Debian Jessie (Debian 8). Exton|OS’s ISO file is a ISO-hybrid, which means that it can very easily be transferred (copied) to a USB pen drive. You can then even run Exton|OS from the USB stick and save all your system changes on the stick. I.e. you will enjoy persistence! I’ve found two scripts which make the installation to USB very simple. The scripts are quite ingenious. My tests show that they work flawlessly on USB installations of all normal Ubuntu systems. Read my INSTRUCTION how to use the scripts.

READ MORE…