Category Archives: LINUX

How to make a simple Frugal install (Puppy Linux like) of many major Linux distributions :: 241025

Recently I found a way to make a simple Frugal install (Puppy Linux like) of many major Linux distributions.  The method is called FirstRibIT. It was announced by wiak at the Puppy Linux Discussion Forum 240630.  At the moment the following Linux distributions are supported:
1 FirstRib anypup (default BookwormPup64_10.0.6.iso; rough shutdown) firstribed using FR wiak initrd
2 PopOS64
3 EndeavourOS
4 Manjaro
7 MakuluLinux-Shift-x64-Ubuntu
8 MX Linux X64
13 Zorin
14 NeonKDE
15 Garuda (warning: Cancel out of disk partitioning install)
16 Bodhi
17 MassOS
18 TinyCoreLinux64
20 Intel Clear Linux
21 Ubuntu_live
23 linux-lite
24 bunsen-lithium
25 LXLE-Focal
26 tails-amd64
27 Debian_live
28 Regata_OS
29 Kodachi
30 SysLinuxOS
31 4MLinux
33 Fedora
34 Xubuntu
35 Lubuntu
36 Mabox
37 Sparky
38 Spiral
44 Linux Mint
98 Generic Arch Linux based
99 Generic Debian/Ubuntu based

NOTE1: To be able to use FirstRibIT you’ll have to have one Linux system installed and use Grub as boot loader.

If you want to try out FirstRibIT you shall follow these steps:
1. Create a folder in the root of your Linux system (/). Name it for example KL-ZORIN.
2. Download a script called firstribit.sh with the command
wget -c https://gitlab.com/firstrib/firstrib/-/raw/master/latest/build_system/firstribit-latest.sh -O firstribit.sh && chmod +x firstribit.sh
3. Put the script firstribit.sh into the folder KL-ZORIN.
4. Download the ISO file Zorin-OS-17.2-Core-64-bit.iso
5. Put the ISO file into the folder KL-ZORIN.
6. Go into the folder KL-ZORIN (cd /KL-ZORIN).
7. Run the command./firstribit.sh optional_f_it_plugname
After a few minutes everything is ready. The only thing left to do is to configure Grub so that Zorin can start – see below.

Add the following lines to /boot/grub/grub.cfg or /etc/grub.d/40_custom (depending on how you have configured your Grub installation):
menuentry ‘MX Linux ::WORK:: (sda2-Samsung_T5)’ –class mxlinux –class gnu-linux –class gnu –class os $menuentry_id_option ‘osprober-gnulinux-simple-3ec7ea01-8e4f-491e-879f-335560d44205’ {
recordfail
load_video
insmod gzio
if [ x$grub_platform = xxen ]; then insmod xzio; insmod lzopio; fi
insmod part_gpt
insmod ext2
if [ x$feature_platform_search_hint = xy ]; then
search –no-floppy –fs-uuid –set=root 3ec7ea01-8e4f-491e-879f-335560d44205
else
search –no-floppy –fs-uuid –set=root 3ec7ea01-8e4f-491e-879f-335560d44205
fi
linux /boot/vmlinuz-6.4.0-1mx-ahs-amd64 root=UUID=3ec7ea01-8e4f-491e-879f-335560d44205 rw quiet acpi_backlight=vendor splash acpi_rev_override=1
initrd /boot/initrd.img-6.4.0-1mx-ahs-amd64
}

menuentry ‘KL-ZORIN (FRUGAL – sdb2 – SAMSUNG) 241025’ –class gnu-linux –class gnu –class os $menuentry_id_option ‘osprober-gnulinux-simple-3ec7ea01-8e4f-491e-879f-335560d44205’ {
recordfail
load_video
insmod gzio
if [ x$grub_platform = xxen ]; then insmod xzio; insmod lzopio; fi
insmod part_gpt
insmod ext2
if [ x$feature_platform_search_hint = xy ]; then
search –no-floppy –fs-uuid –set=root 3ec7ea01-8e4f-491e-879f-335560d44205
else
search –no-floppy –fs-uuid –set=root 3ec7ea01-8e4f-491e-879f-335560d44205
fi
linux /KL-ZORIN/vmlinuz w_bootfrom=UUID=3ec7ea01-8e4f-491e-879f-335560d44205=/KL-ZORIN w_changes=RAM2
initrd /KL-ZORIN/initrd.gz
}

NOTE2: MX Linux is my main Linux system where the frugal installation of Zorin is made. As you can see the UUID is the same for both systems. You shall of course change the UUID to suit your installation.

Now you can just reboot your computer and enjoy Zorin (or any other Linux system of the ones I’ve listed above). I myself have tested FirstRibIT also for Fedora and Manjaro. Works very well as expected.  The Grub lines (configuration) is the same for all Linux systems supported.

When running Zorin or any of the other Linux systems, which are supported, you can of course change the system to your liking and upgrade the whole system. To make your system changes permanent you shall run the command sudo save2flash before power off or rebooting your computer.

NOTE3: You may have to install Yad before running the command sudo save2flash.

SCREENSHOTS
1. Using save2flash
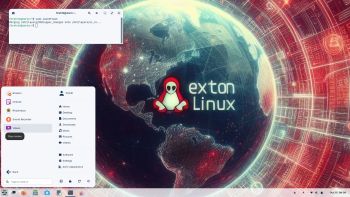
2. The Zorin Desktop (after some changes)
3. Upgrading the Zorin system

################################################

Read about my Android-x86 Systems – 11, 10, Pie, Oreo, Nougat, Marshmallow, Lollipop and KitKat at
andex.exton.net – latest is AndEX 11 (with GAPPS), AndEX 10 (with GAPPS) and AndEX Pie 9.0 (also with GAPPS)!
and
about my Android 14, 13, 12, 11, 10, Pie, Oreo, Nougat, Marshmallow and Lollipop versions for Raspberry Pi 5, Pi 4 and  Pi 3/2 at
raspex.exton.se
– latest is RaspAnd 14 (with GAPPS), 13 and 12 (without GAPPS), RaspAnd 11 (with GAPPS) and RaspAnd Oreo 8.1
(also with GAPPS)!

EXTON Linux MultiBootCD 6-OS :: 230929

Latest News about EXTON Linux MultiBootCD 6-OS 230929
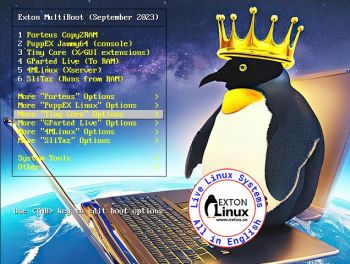
A new version of EXTON Linux MultibootCD 6-OS is ready. The previous version is from February 15, 2019. Changes: New (latest) versions of Porteus, GParted Live, Puppy Linux (PuppEX Jammy64), 4MLinux, SliTaz and Tiny Core. Note about VirtualBox: All systems can run in VirtualBox.

SCREENSHOTS
1. Porteus v. 5.01 Desktop
2. PuppEX Jammy64 (Puppy Linux) Desktop
3. Tiny Core 14.0 Desktop
4. GParted Live 1.5.0-6 Desktop
5. 4MLinux 43.1 Desktop
6. SliTaz 5.0 Rolling release Desktop

ABOUT Ventoy
There is no REAL need for a multibootcd anymore. You can use Ventoy and just drop/copy any Linux ISO to a USB stick and run it from there. Ventoy is an open source tool to create bootable USB drive for ISO files. With Ventoy, you don’t need to format the disk again and again, you just need to copy the iso file to the USB drive and boot it. You can copy many iso files at a time and Ventoy will give you a boot menu to select them – screenshot. READ MORE about Ventoy…
So I should really abandon my multibootcd project…

READ MORE…

Read about my Android-x86 Systems – 11, 10, Pie, Oreo, Nougat, Marshmallow, Lollipop and KitKat at
andex.exton.net – latest is AndEX 11 (with GAPPS), AndEX 10 (with GAPPS) and AndEX Pie 9.0 (also with GAPPS)!
and
about my Android 13, 12, 11, 10, Pie, Oreo, Nougat, Marshmallow and Lollipop versions for Raspberry Pi 4 and 3/2 at
raspex.exton.se
– latest is RaspAnd 13 and 12 (without GAPPS), RaspAnd 11 (with GAPPS) and RaspAnd Oreo 8.1 (also with GAPPS)!

ExTiX Deepin 23.4 Live based on Deepin 23 Alpha 2 (latest) with Refracta Snapshot and kernel 6.3.0-rc4-amd64-exton :: Build 230403

NEWS 230403 ABOUT ExTiX with Deepin 23 ALPHA 2
I’ve released a new version of ExTiX Deepin today (230403). This ExTiX Build is based on Deepin 23 Alpha 2 (latest version) released by Deepin Technology 230208. Please read the Release Notes…
As you can see the developers urge people to try Deepin Alpha 2 in a non-production environment! I must say, though, that I haven’t discovered any “bugs”. And the installed programs won’t “crash” or anything like that. On the contrary ExTiX Deepin 23.4 with the Deepin DE 23 works pretty well I would say. I have nevertheless kept ExTiX 22.12 with Deepin 20.8 on the server. Deepin 20.8 is the stable version released 221208. ExTiX 23.4 uses kernel 6.3.0-rc4-amd64-exton. ExTiX 23.4 works in the same way as all other ExTiX versions. I.e. you can install it to hard drive while running the system live. Use Refracta Installer for that. You can also create your own live installable Deepin 23 system with Refracta Snapshot. (Using ExTiX 23.4 as a “base system”). So easy that a ten year old child can do it!

SCREENSHOTS
1. ExTiX 23.4 running in full screen in VirtualBox (VirtualBox Guest Additions are pre-installed)
2. ExTiX Deepin 23.4 Desktop
3. ExTiX 23.4 is running in VMware
4. ExTiX 23.4 using Samba

READ MORE…

Read about my Android-x86 Systems – 11, 10, Pie, Oreo, Nougat, Marshmallow, Lollipop and KitKat at
andex.exton.net – latest is AndEX 11 (with GAPPS), AndEX 10 (with GAPPS) and AndEX Pie 9.0 (also with GAPPS)!
and
about my Android 12, 11, 10, Pie, Oreo, Nougat, Marshmallow and Lollipop versions for Raspberry Pi 4 and 3/2 at
raspex.exton.se
– latest is RaspAnd 12 (without GAPPS), RaspAnd 11 (with GAPPS) and RaspAnd Oreo 8.1 (also with GAPPS)!


A YouTube Video: “Five (5) Linux Distros to watch in 2023” by eBuzz Central

A YouTube Video: “Five (5) Linux Distros to watch in 2023” by eBuzz Central

eBuzz Central: A video covering 5 specific distros I believe we need to keep an eye on in 2023. They range everywhere from basic distros to gaming distros. I believe they will bring new possibilities to the Linux community.

Intro 0:00 – 2:19
Dahlia OS 2:20 – 13:21
ExTiX Linux 13:22-24:10
SteamOS (Arch Based) 24:11 – 38:35
Modicia OS 38:36 – 54:54
Vanilla OS 54:55 – 1:09:46

As you can see ExTiX (Build 221218) with Deepin 20.8 is among the five recommended Distros.

Watch the YouTube Video

READ MORE about ExTiX…

Read about my Android-x86 Systems – 11, 10, Pie, Oreo, Nougat, Marshmallow, Lollipop and KitKat at
andex.exton.net – latest is AndEX 11 (with GAPPS), AndEX 10 (with GAPPS) and AndEX Pie 9.0 (also with GAPPS)!
and
about my Android 12, 11, 10, Pie, Oreo, Nougat, Marshmallow and Lollipop versions for Raspberry Pi 4 and 3/2 at
raspex.exton.se
– latest is RaspAnd 12 (without GAPPS), RaspAnd 11 (with GAPPS) and RaspAnd Oreo 8.1 (also with GAPPS)!
LFA (Linux For All) 64bit Live DVD Build 220412 with kernel 5.17.2-amd64-exton :: Create you own LFA/Ubuntu installable 22.04 LTS system!

Linux For All (LFA) Build 220412 with Gnome 42
is a simple remaster of upcoming Ubuntu 22.04, code-named Jammy Jellyfish. It’s a total rebuild. I.e. nothing is left of the old LFA system. NOTE: Ubuntu 22.04 LTS will be supported until April 2027.

NEWS ABOUT LFA Build 220412

1. All packages the ordinary Linux user can wish for are pre-installed. Study the full packages list.
2. Kernel 5.17.2-amd64-exton (with Debian patches) is used. You can of course switch to Ubuntu’s original kernel if you prefer.
3. The Desktop environment is Gnome 42. (Ubuntu’s original DE).
4. The main Web Browser is Firefox. So you can watch Netflix!
5. I have included Refracta tools (Refracta Snapshot) to make it possible for you to create your own installable Ubuntu 22.04 Live DVD once you have installed LFA to hard drive.
6. You can run LFA fast in RAM. Use boot alternative 2 Load to RAM. The LFA ISO file is of only 1470 MB to be compared with Ubuntu’s original ISO of 2900 MB.
7. VirtualBox Guest Additions are pre-installed , which means (among other things) that you can run LFA in VirtualBox in full screen. Watch this screenshot.

SCREENSHOTS
Screenshot 1 – LFA Gnome running in VirtualBox
Screenshot 2 – Running Samba to reach Windows computers
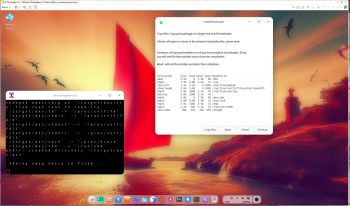
Screenshot 3 – Refracta Installer has started
Screenshot 4 – Running Refracta Installer and installing Grub
Screenshot 5 – Running LFA Gnome from a USB stick after I’ve made some persistent changes
Screenshot 6 – root’s Desktop in Gnome

READ MORE…

Read about my Android-x86 Systems – 10, Pie, Oreo, Nougat, Marshmallow, Lollipop and KitKat at
andex.exton.net – latest is AndEX 10 (with GAPPS) and AndEX Pie 9.0 (also with GAPPS)!
and

about my Android 12, 11, 10, Pie, Oreo, Nougat, Marshmallow and Lollipop versions for Raspberry Pi 4 and 3/2 at
raspex.exton.se
– latest is RaspAnd 12 (without GAPPS), RaspAnd 11 (with GAPPS) and RaspAnd Oreo 8.1 (also with GAPPS)!
DebEX Budgie/Gnome/Enlightenment – Build 211215 – with Budgie Desktop 10.5, Gnome 40, Enlightenment 0.24.2, penguins-eggs (remaster tool) and kernel 5.15.5-exton-amd64-rt21

About DebEX Barebone Budgie/Gnome/Enlightenment, DebEX Gnome and DebEX KDE Plasma Linux 64 bit
All three systems/distributions are based on Debian. Budgie Desktop 10.5, Gnome 40 and Enlightenment 0.24.2 are used as Desktop environments in DebEX Budgie/Gnome/Enlightenment Build 211215. Gnome 3.38 is used in DebEX Gnome. KDE Plasma Desktop 5:20 is used in DebEX KDE. The system language is English (in all three versions of DebEX).

NEWS 211215 about DebEX Budgie/Gnome/Enlightenment – a penguins-eggs Build
A new version of DebEX – based on Debian Sid (unstable) – with Budgie Desktop 10.5, Gnome 40, Enlightenment 0.24.2 and kernel 5.15.5-exton-amd64-rt21 is ready. All packages have been updated to the latest version as of December 15, 2021.

Most important Changes
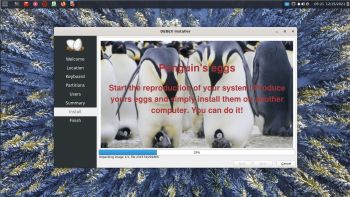
When you start up DebEX Build 211215 live (from a DVD or a USB stick) you will end up logged in as the ordinary user user to the Budgie Desktop. The password for user is live. You can log out from Budgie and log in again to Gnome or Enlightenment. You can also log in from LightDM as root (super admin). The password for root is root. NOTE: You can’t log in to the Enlightenment Desktop when running DebEX Build 211215 in VirtualBox or VMware. You can use the Calamares 3.2.48-1 Installer Framework to install DebEX Budgie/Gnome/Enlightenment to your computer in any language. You can even use Calamares in VirtualBox and VMware – i.e. non-efi computers. Watch this animated GIF. My other DebEX builds were created with Refracta Snapshot. This DebEX Build (211215) is, however, created with a remaster tool called penguins-eggs. Very easy to handle. Penguins-eggs is a console utility, in active development, who let you to remaster your system and redistribute it as iso images or from the lan via PXE remote boot. You can use penguins-eggs in any Debian/Ubuntu system installed to hard drive. Basically you only need to start up a terminal and run the command sudo eggs dad -c. Then just follow the instructions – see the screenshots below. If you haven’t installed Calamares you will be asked to do so. Do that even if you already have Calamares installed. A system/ISO built with penguins-eggs must use a special Calamares version to be installable. Penguins-eggs is developed by Piero Proietti. It is based on Remastersys, Refracta, Systemback and father Knoppix.

How-to use penguins-eggs
1. Install DebEX (or any other Debian/Ubuntu based system) to hard drive
2. Change everything to your liking
3. Open up a terminal and run the command sudo eggs dad -c
Screenshot 1NOTE: If you choose fast your new ISO will be ready in about five minutes (even in VirtualBox). If you choose max it will take about two hours (in VirtualBox), but the ISO will be about 500 MB smaller. (As regards new builds of DebEX Build 211215). A smaller ISO has one disadvantage. It doesn’t boot as fast as the one built using the option fast.
4. Go on choosing Yes
Screenshot 2
5. Go on choosing Yes
Screenshot 3
6. Go on choosing Yes
Screenshot 4
7. You new ISO is ready!
Screenshot 5
NOTE: You can remaster DebEX in VirtualBox or VMware if you want. VirtualBox Guest Additions are pre-installed so you can run DebEX in full screen in VirtualBox. Watch this screenshot.


OTHER SCREENSHOTS
1. The Budgie Desktop for the ordinary user user
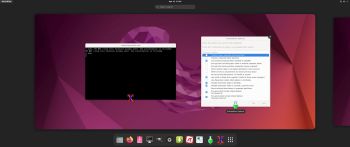
2. The Gnome Desktop for user
3. The Enlightenment Desktop for user
4. The Boot menu when running DebEX live
5. The Boot menu when running DebEX from hard drive (in VirtualBox)
6. A Samba connection in DebEX – a way to transfer your new ISO to another computer
7. Installing and running Spotify in DebEX

READ MORE…

Read about my Android-x86 Systems – 10, Pie, Oreo, Nougat, Marshmallow, Lollipop and KitKat at
andex.exton.net – latest is AndEX 10 (with GAPPS) and AndEX Pie 9.0 (also with GAPPS)!
and

about my Android 11, 10, Pie, Oreo, Nougat, Marshmallow and Lollipop versions for Raspberry Pi 4 and 3/2 at
raspex.exton.se
– latest is RaspAnd 11 (with GAPPS) and RaspAnd Oreo 8.1 (also with GAPPS)!

ExTiX LXQt 21.11 with kernel 5.15.5-exton-amd64-rt21 and Kodi 19.3 Matrix runs very well on the Intel Compute Stick

ExTiX LXQt 21.11 with LXQt 0.17 and Kodi 19.3 Matrix runs very well on the Intel Compute Stick. Watch this screenshot.

Read about Intel Compute Sticks…

History
This is what I wrote on December 3, 2016: I have made a new version of ExTiX – The Ultimate Linux System. I call it ExTiX 16.5 LXQt for the Intel Compute Stick. Build 161203 is only for Intel Compute Sticks. I.e. you can’t run the system on other computers. Build 161203 uses “my” kernel 4.8.0-26-exton-IntelAtom with special patches, which I have Linuxium to thank for. READ MORE…

Kernel patches isn’t needed anymore, which means that any Linux system can be installed to the stick. For example ExTiX LXQt 21.11.

Kernel 5.15.5 LTS
If you already have a Ubuntu/Debian system installed on your stick you can download and install “my” kernel 5.15.5-exton-amd64-rt21.

What’s new in kernel 5.15 LTS?

About Kodi 19.3
Kodi runs very well on the stick. On a web site called FireStickTricks you can find instructions how to install 27 (?!) extra Kodi Builds with their own repositories and skins. The article is called Best Kodi Builds December 2021. I have tried four of them myself. Titanium Build, No Limits Magic, Diggz Xenon and Innovation. They are very easy to install and work very well. Perhaps you’ll find your own favorite!

SCREENSHOT
1. ExTiX 21.11 running on the Intel Compute Stick with the LXQt Desktop
2. Kodi 19.3 running on the Intel Compute Stick  showing System info

Read about my Android-x86 Systems – 10, Pie, Oreo, Nougat, Marshmallow, Lollipop and KitKat at
andex.exton.net – latest is AndEX 10 (with GAPPS) and AndEX Pie 9.0 (also with GAPPS)!
and

about my Android 11, 10, Pie, Oreo, Nougat, Marshmallow and Lollipop versions for Raspberry Pi 4 and 3/2 at
raspex.exton.se
– latest is RaspAnd 11 (with GAPPS) and RaspAnd Oreo 8.1 (also with GAPPS)!
SlackEX live with Refracta Snapshot based on Slackware 15.0 RC1 – Build 211014

Slackware is the first widely-used Linux system, which is still developing. Slackware has existed since 1993. In comparison with for example Ubuntu and Linux Mint, many people believe that Slackware is “difficult”. Any novice can quickly learn to use Ubuntu they say. My remaster of Slackware Current (15.0/14.2), which I call SlackEX 15.0/14.2/Current 64 bit Linux Live DVD, is however just as easy to use as Ubuntu and/or Linux Mint. Some tend to complain that the Program Management in Slackware is awkward. That was perhaps earlier the case, but not anymore. Now we have the Application Managers Slackpkg and GSlapt – a GTK version of slapt-get. They are a piece of cake to use! Users of Synaptic will feel at ease with GSlapt. (Only in the Enlightenment version though).

NEWS 211014 ABOUT SlackEX 15.0 RC1 with Xfce4
Slackware is not dead
even though not much has happen since Slackware 14.2 was released in July 2016. The main differences of Slackware 15 are booked to updating the versions of programs, including the transition to the Linux 5.10 kernel, a set of GCC compilers 10.3 and the system library glibc 2.33. SlackEX Build 211014 is a live remaster of Slackware 15.0 RC1. This build replaces version 210422, which was based on Slackware 15.0 BETA. A new kernel – 5.10.70-exton-amd64-rt53 – with better support for new hardware, for example new touchscreens and touchpads, is used in Build 211014. Study all pre-installed packages in Build 211014.

SCREENSHOTS
Screenshot 1 – user’s Desktop
Screenshot 2 – Showing a Samba connection
Screenshot 3 – root’s Desktop
Screenshot 4 – running in full screen in VirtualBox
Screenshot 5 – running in RAM

READ MORE…

Read about my Android-x86 Systems – 10, Pie, Oreo, Nougat, Marshmallow, Lollipop and KitKat at
andex.exton.net – latest is AndEX 10 (with GAPPS) and AndEX Pie 9.0 (also with GAPPS)!
and

about my Android 11, 10, Pie, Oreo, Nougat, Marshmallow and Lollipop versions for Raspberry Pi 4 and 3/2 at
raspex.exton.se
– latest is RaspAnd 11 (with GAPPS) and RaspAnd Oreo 8.1 (also with GAPPS)!
LFS EXTON – a live installable Linux system built from Linux From Scratch 10.1 and Beyond Linux From Scratch 10.1 (BLFS) with the latest packages and scripts :: 210706

LFS EXTON Linux live DVD/USB is built using Linux From Scratch 10.1 and Beyond Linux From Scratch 10.1 (BLFS) , which has the latest Linux packages and scripts.

NEWS 210706
I finally made Refracta Installer to work in LFS EXTON! Now you can install LFS EXTON to hard drive like any other Linux distribution. Just start Refracta Installer from the menu and follow the instructions. Watch this screenshot.
NOTE: You should create the install partition in advance. Use GParted for that.

LXDE and LightDM

LFS EXTON uses LXDE as Desktop environment. LXDE is designed to be user friendly and slim, while keeping the resource usage low. LFS EXTON has all the tools needed for you to go on and install other Desktop environments or whatever you like (after a hard drive installation of LFS EXTON).

Build your own Linux system
You can also just use LFS EXTON Live DVD/USB as build environment when building your own Linux system from scratch. That can be done in VirtualBox in full screen since VirtualBox Guest Additions are pre-installed.

Install LFS EXTON to a USB stick
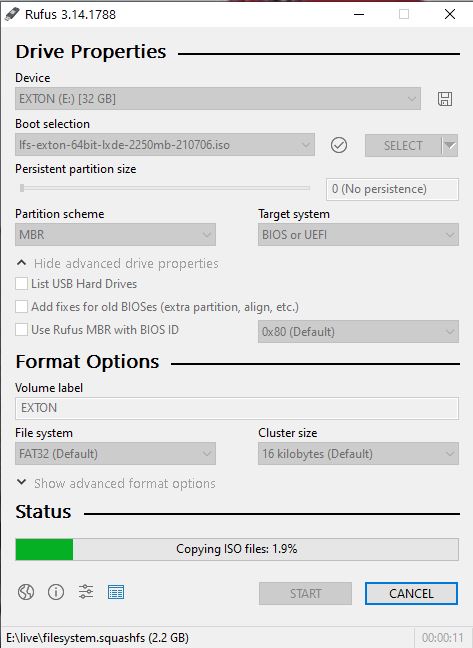
Install the ISO file to a USB stick with Rufus 3.14 in Windows. It will look like this.

LOGIN to LXDE
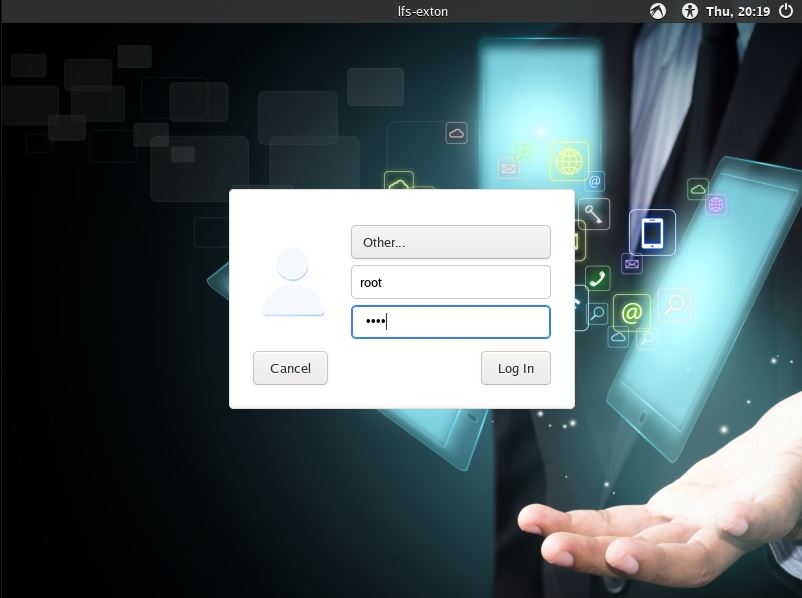
Login as root with password root$$ or as the ordinary user lfs with password linux$$. While logged in as lfs you can use Sudo to become root. Example commands: sudo su and sudo pcmanfm. LightDM‘s login screen will look like this.


Install to hard drive using Refracta Installer
1. Start Refracta Installer from the menu and follow the program instructions. Watch this screenshot.
2. Install options – screenshot.
3. Ready to install – screenshot.
4. When asked to chroot and install Grubscreenshot.
5. Keep current user (lfs) and root passwords – screenshot.
6. When the installation is complete you will see this – screenshot.
7. Notice the disk space used after installation to hard drive – screenshot.
8. For user lfs to be able to use Sudo after a hard drive installation you’ll have to edit /etc/sudoers as root with Nano or Mousepad. Add this line to the end:
lfs ALL=(ALL) NOPASSWD:ALLscreenshot.
NOTE: If you already use Grub as boot loader you shall refrain from installing Grub when installing LFS EXTON to hard drive. Just add the boot lines below to /boot/grub/grub.cfg on the partition where you have Grub installed. You shall (of course) never mess with your current EFI Grub installation. LFS EXTON can run on EFI computers, but you can’t make an EFI Grub installation using LFS EXTON.

Install to hard drive – only as regards LFS EXTON Build 210703
You’ll find the install scripts in /root/install. To perform the installation in VirtualBox follow these instructions.
1. Login to LXDE as root.
2. Create an install partition of at least 30 GB and a swap partition of about 2 GB. The LFS system will only use about 10 GB, but you’ll need 30 GB at first anyway. See why below. Use GParted for the creation of the partitions.
3. Run the command cd /root/install
4. Run the install command ./install.sh /dev/sda1 /dev/sda2 – watch this screenshot.
5. Install the boot manager Grub when the installation is ready. You will see a lot of error messages, but don’t worry. Everything is alright. Install Grub with the command ./install-boot.sh /dev/sda1 /dev/sda – watch this screenshot.
6. Start up LFS EXTON from your virtual hard drive. You will notice that the install partition (/dev/sda1) is about 30 GB. That’s because the folder /lib/live wasn’t removed during the installation. Remove it with the command sudo rm -rf /lib/live – watch this screenshot. After that everything is back to normal. Watch a screenshot showing used disk space before and after the delete command. (85 % respectively 33 %).
NOTE: You can of course also install LFS EXTON on any normal computer. If you want to do that you should at first read my instruction How To dual boot, triple boot or multi boot Linux with Windows in a simple way and be happy. The Grub boot lines for LFS EXTON in /boot/grub/grub.cfg can look like this:
#################################################
menuentry ‘LFS EXTON 210703 (/dev/sda6)’ –class lfs –class gnu-linux –class gnu –class os $menuentry_id_option ‘gnulinux-simple-191fccec-4ecc-48b2-879d-504f9a2ad365’ {
recordfail
load_video
insmod gzio
if [ x$grub_platform = xxen ]; then insmod xzio; insmod lzopio; fi
insmod part_gpt
insmod ext2
if [ x$feature_platform_search_hint = xy ]; then
search –no-floppy –fs-uuid –set=root 191fccec-4ecc-48b2-879d-504f9a2ad365
else
search –no-floppy –fs-uuid –set=root 191fccec-4ecc-48b2-879d-504f9a2ad365
fi
linux /boot/vmlinuz-5.12.8-exton root=/dev/sda6 ro
initrd /boot/initrd.img-5.12.8-exton
}
###############################################

Kernel

LFS EXTON uses my “special” kernel 5.12.8-exton. You can of course compile you own LFS kernel if you want.

“Normal” use of the system
You can also use LFS EXTON as any other “normal” Linux system. You can for example run Netflix in Firefox.

Sound in LFS EXTON
You will only have sound when logged in to LXDE as the normal user lfs.

Run it fast!
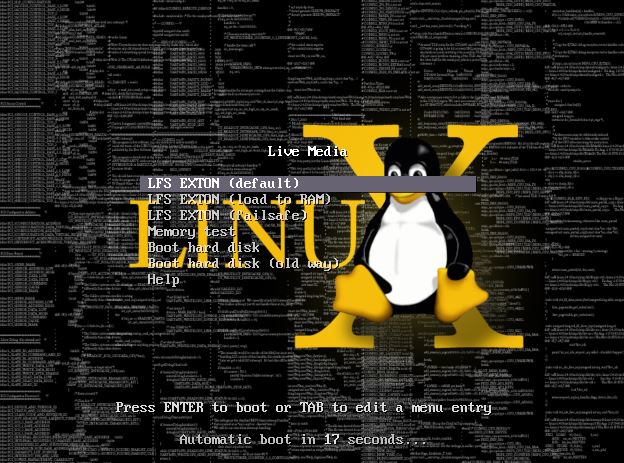
The system is quite fast and responsive. You can run LFS EXTON live super fast from RAM. When the boot process is ready you can eject the DVD or USB stick – screenshot. Use Boot alternative 2 or Advanced options… >> load to RAM. Watch the live boot screen below.

DOWNLOAD
This version of LFS EXTON has been replaced by Build 221103…

Read about my Android-x86 Systems – 10, Pie, Oreo, Nougat, Marshmallow, Lollipop and KitKat at
andex.exton.net – latest is AndEX 10 (with GAPPS) and AndEX Pie 9.0 (also with GAPPS)!
and

about my Android 12, 11, 10, Pie, Oreo, Nougat, Marshmallow and Lollipop versions for Raspberry Pi 4 and 3/2 at
raspex.exton.se
– latest is RaspAnd 12 (without GAPPS), RaspAnd 11 (with GAPPS) and RaspAnd Oreo 8.1 (also with GAPPS)!